Single-Region Positioning Deployment
This tutorial is a 1D and 2D minimum positioning unit deployment solution. Through this tutorial, users can complete the deployment of the minimum positioning unit by themselves.
1D Positioning
1D positioning can only use manual calibration method.
First, connect the gateway to the computer, and check in the client's device management interface to make sure that the beacons you want to use are online.
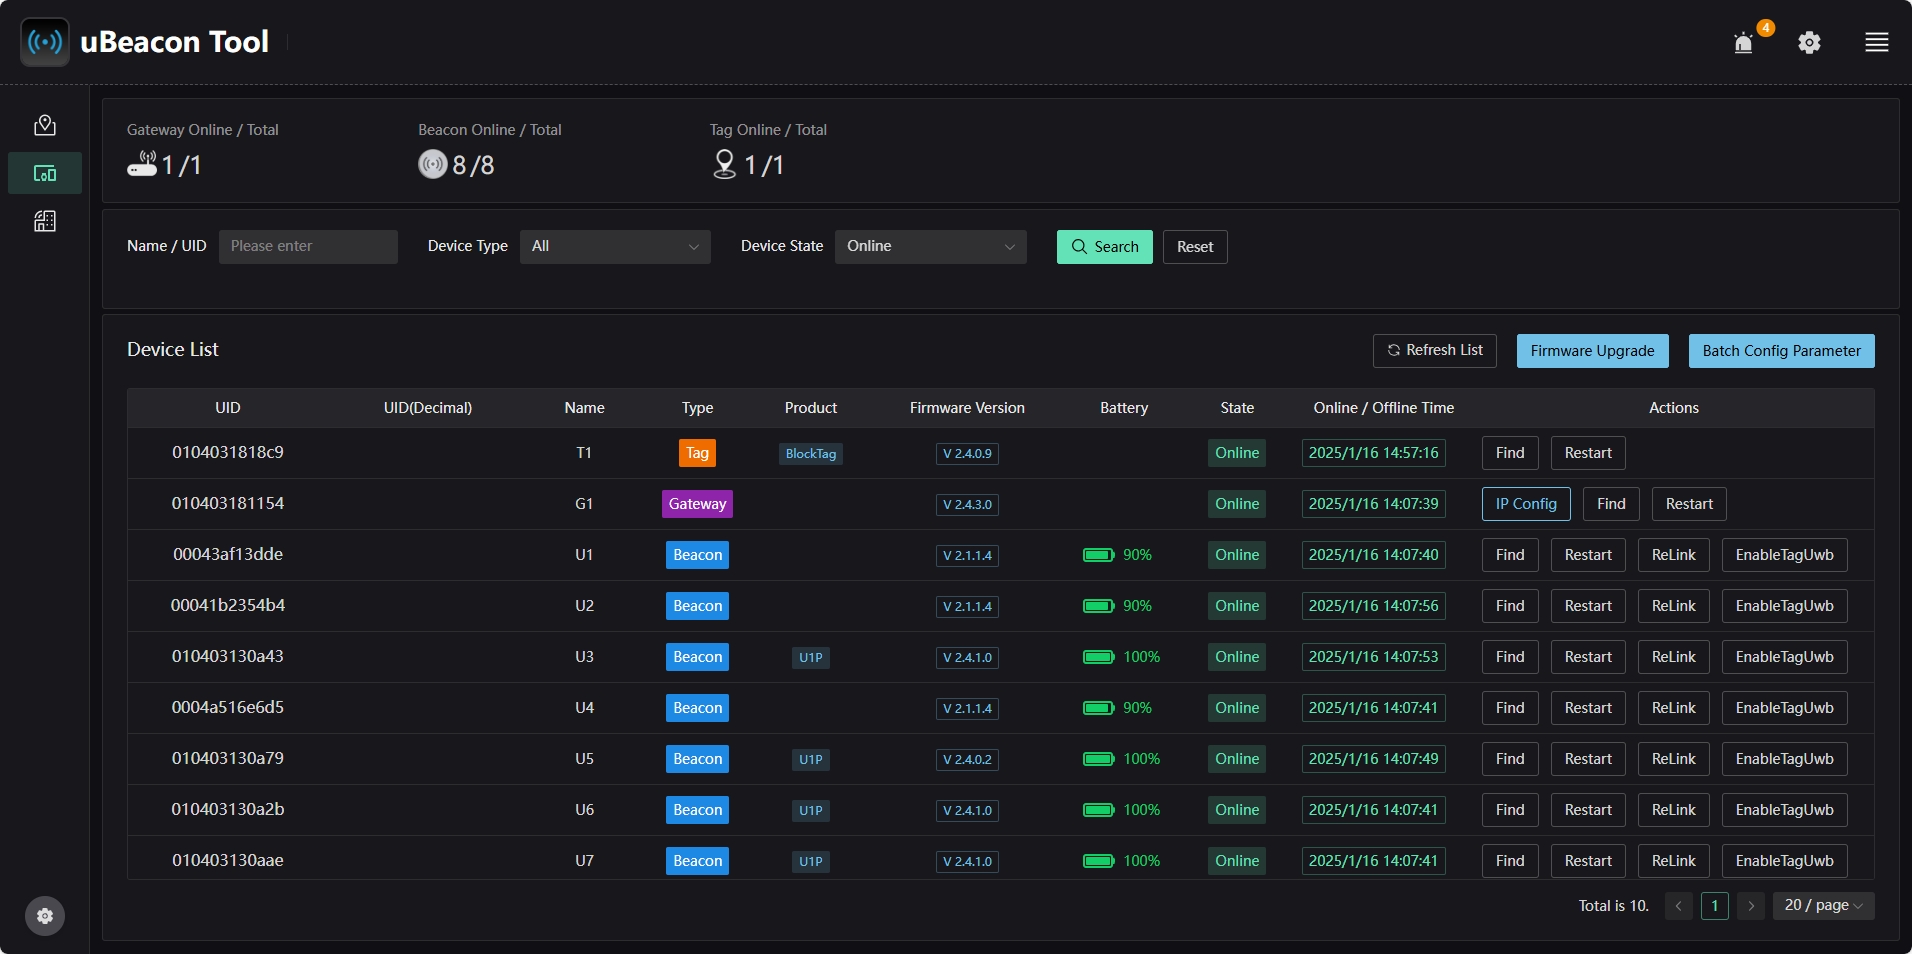
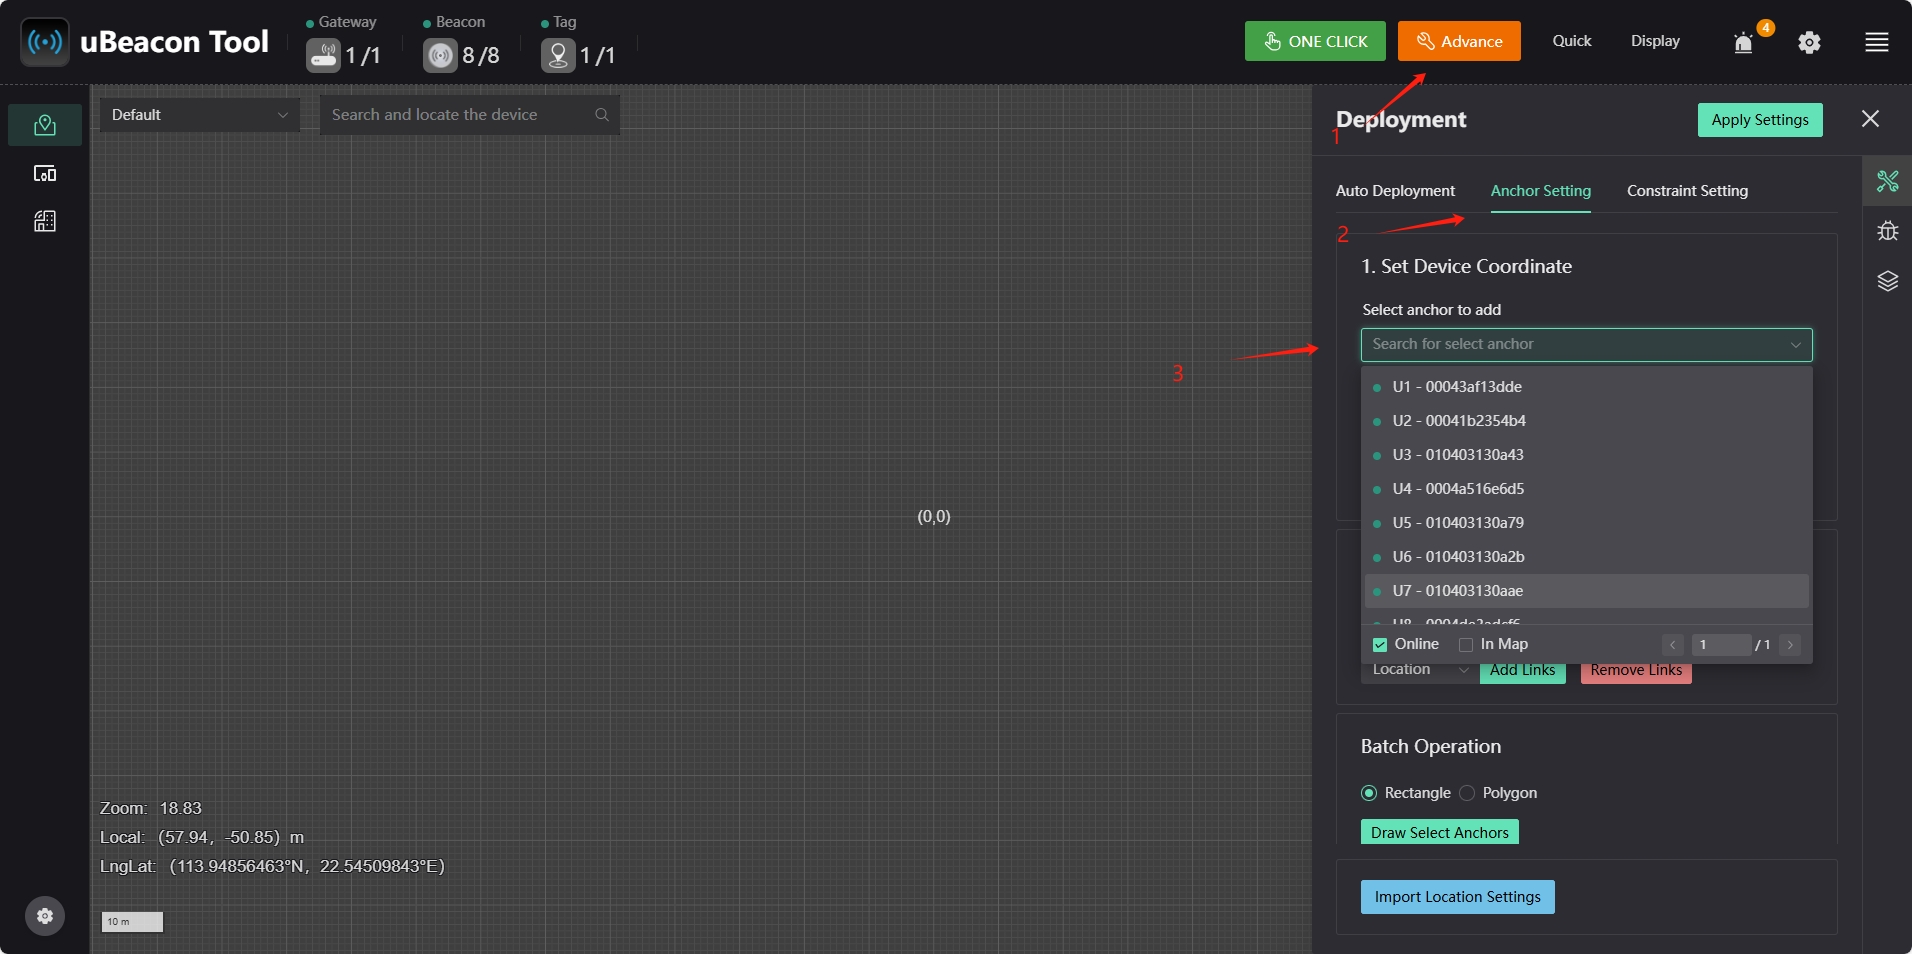
On the "Map Devices" screen, click the "Advance" button in the upper right corner, open "Deployment", select "Anchor Setting", and click the beacon to be used in the "Set Device Coordinate" column.
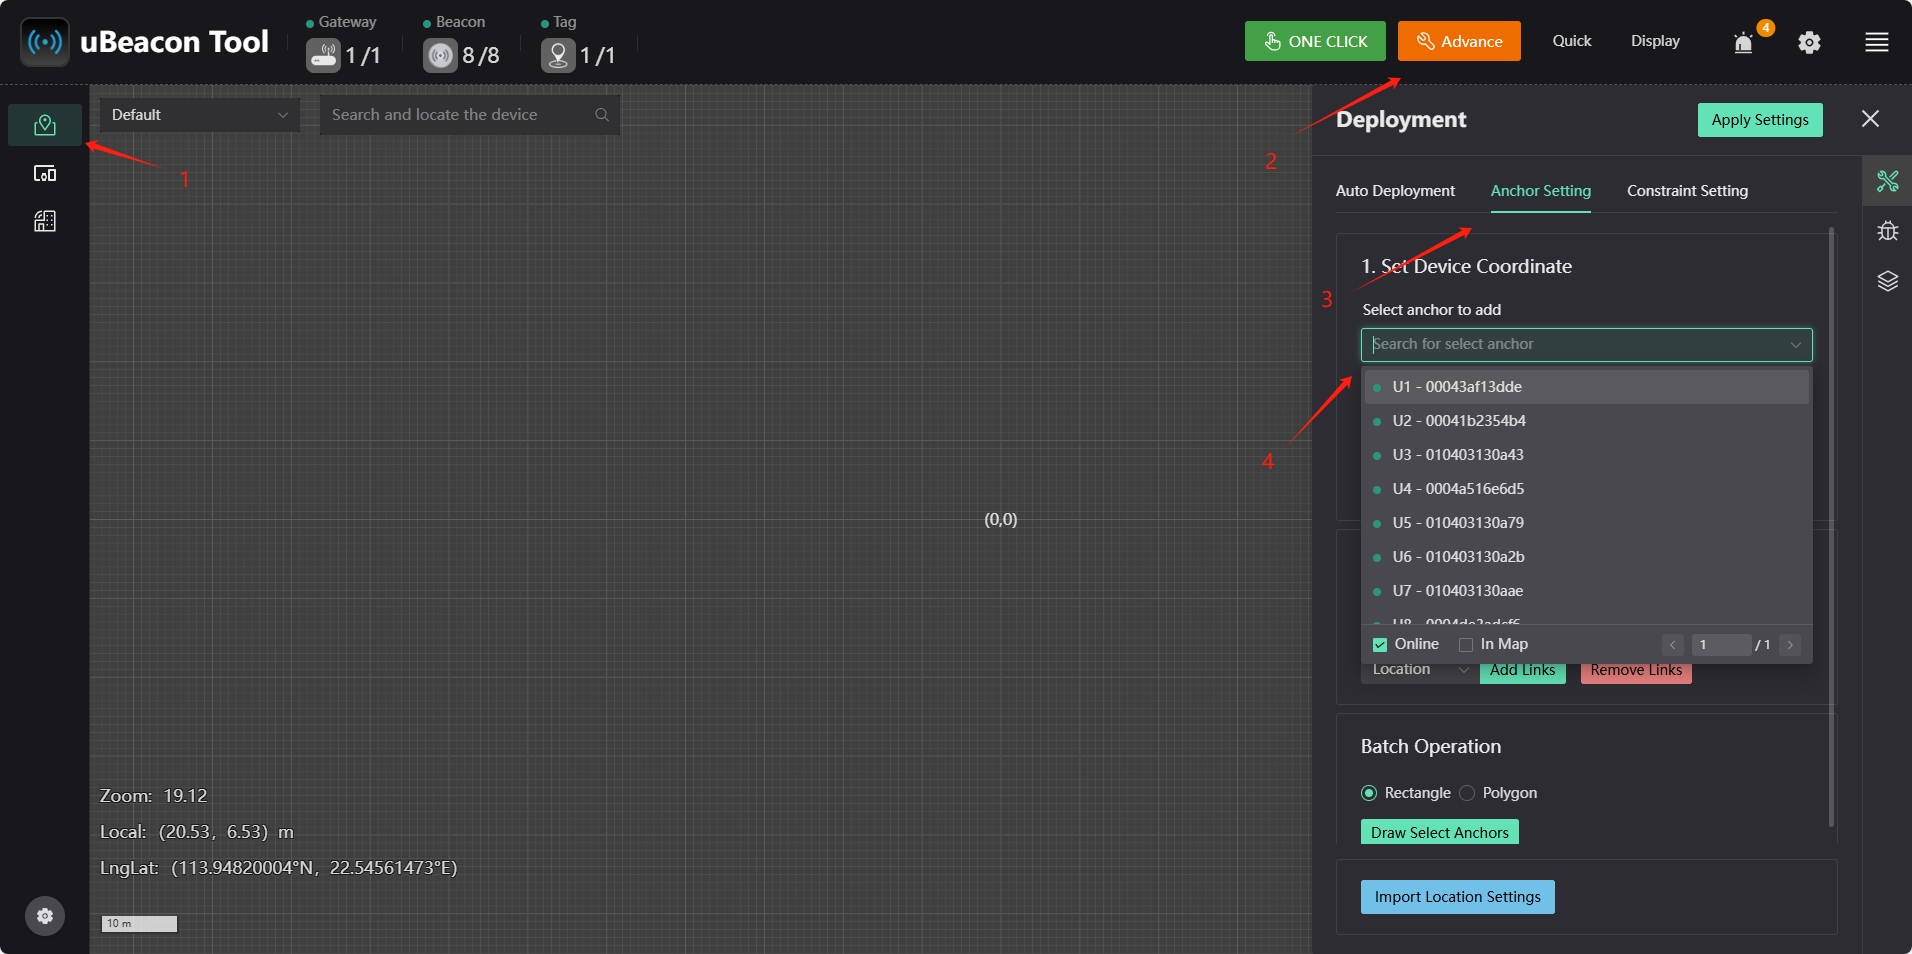
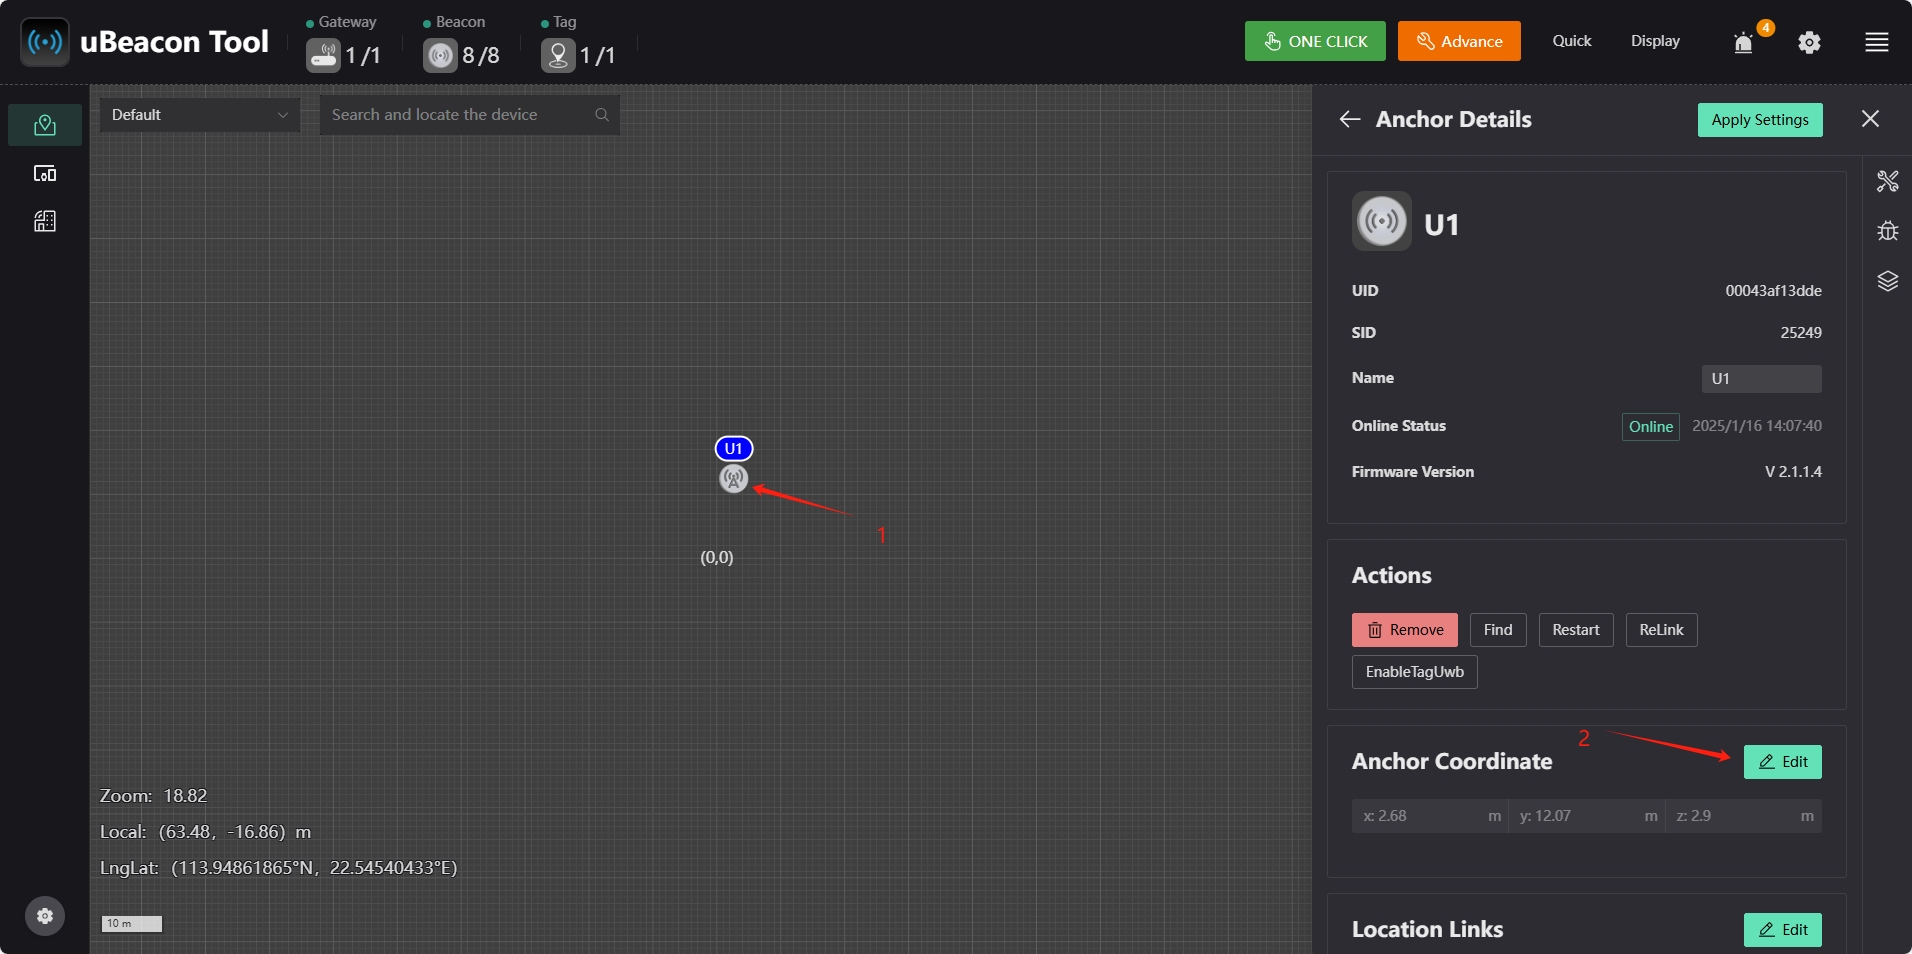
In the "Set Device Coordinate" column, click the beacon you want to use and then click anywhere on the map to add it. After the beacon is added to the map, click the beacon icon and click "Edit" in the "Anchor Coordinate" column to modify the coordinate parameters of the beacon.
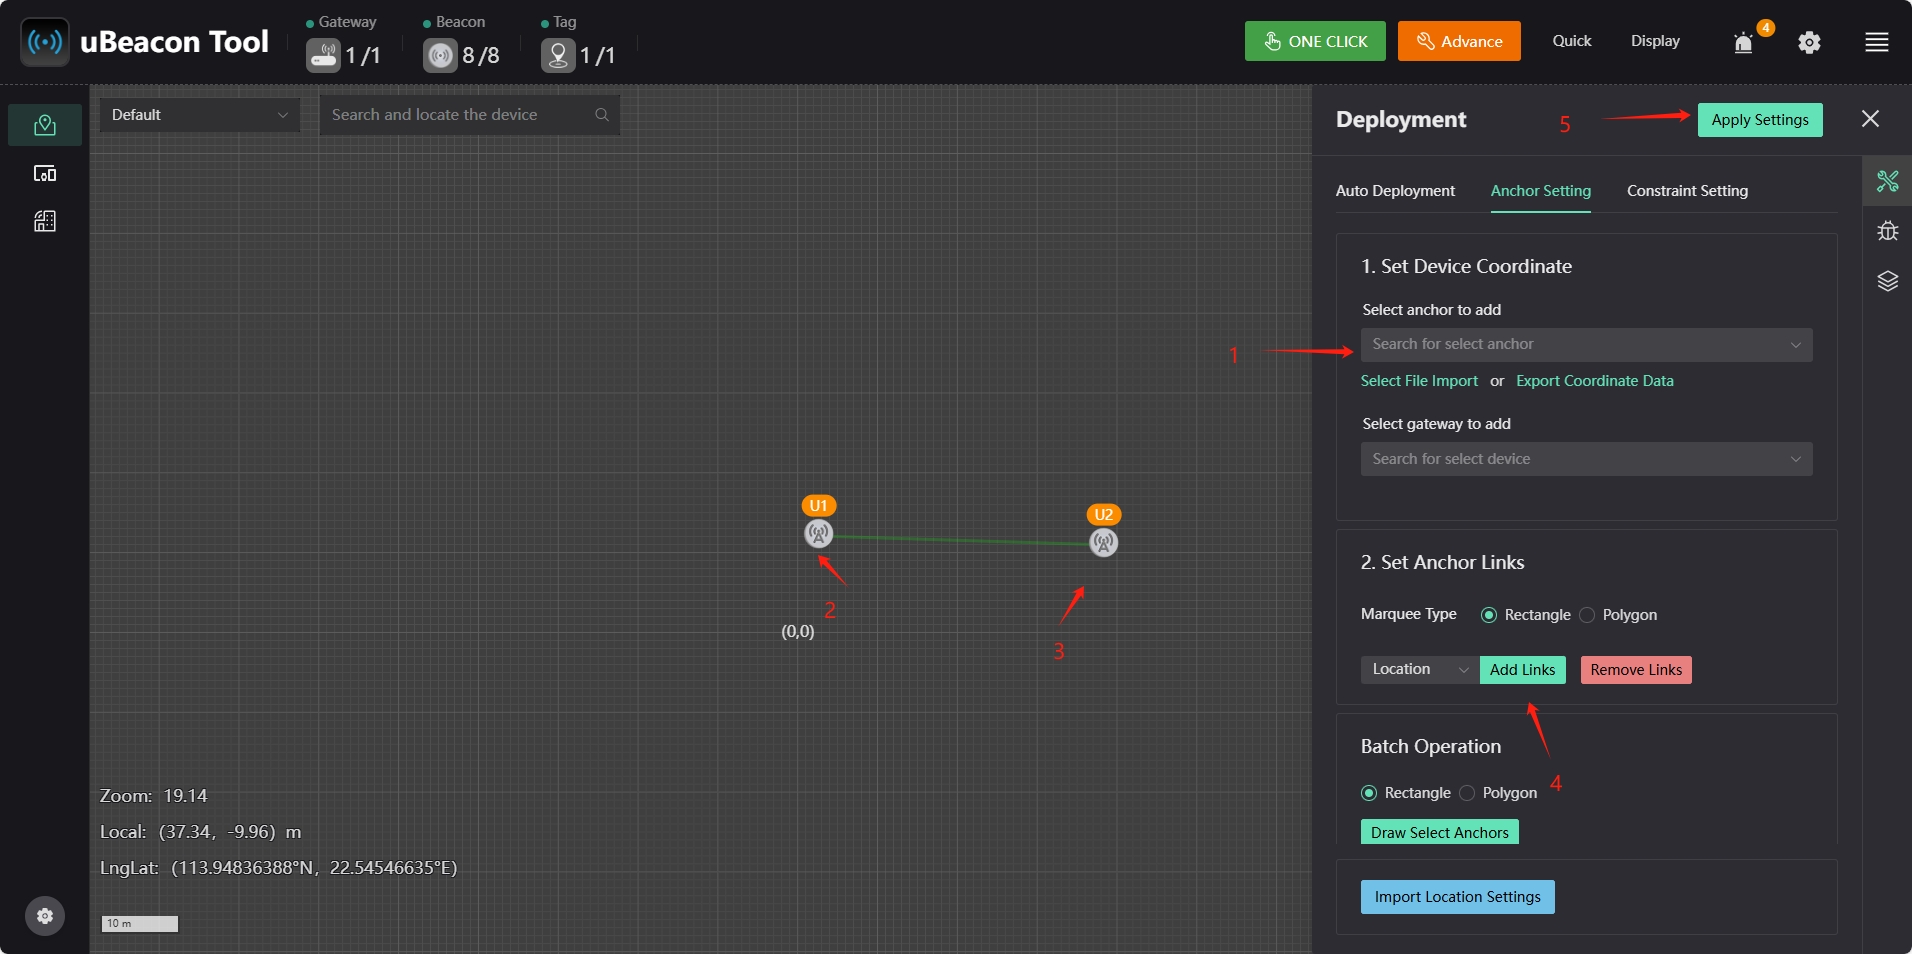
Add two beacons in sequence. After placing the beacons in the map, click "Add Links" in the "Set Anchor Links" setting bar to select the two beacons in the map for "uBeacon" networking. After the networking is successful, green lines will be formed between the beacons. After the networking is completed, click "Apply Settings" in the upper right corner to save the configuration and complete the one-dimensional basic configuration.
2D Positioning
First, connect the gateway to the computer, and check in the client's device management interface to make sure that the beacons you want to use are online.

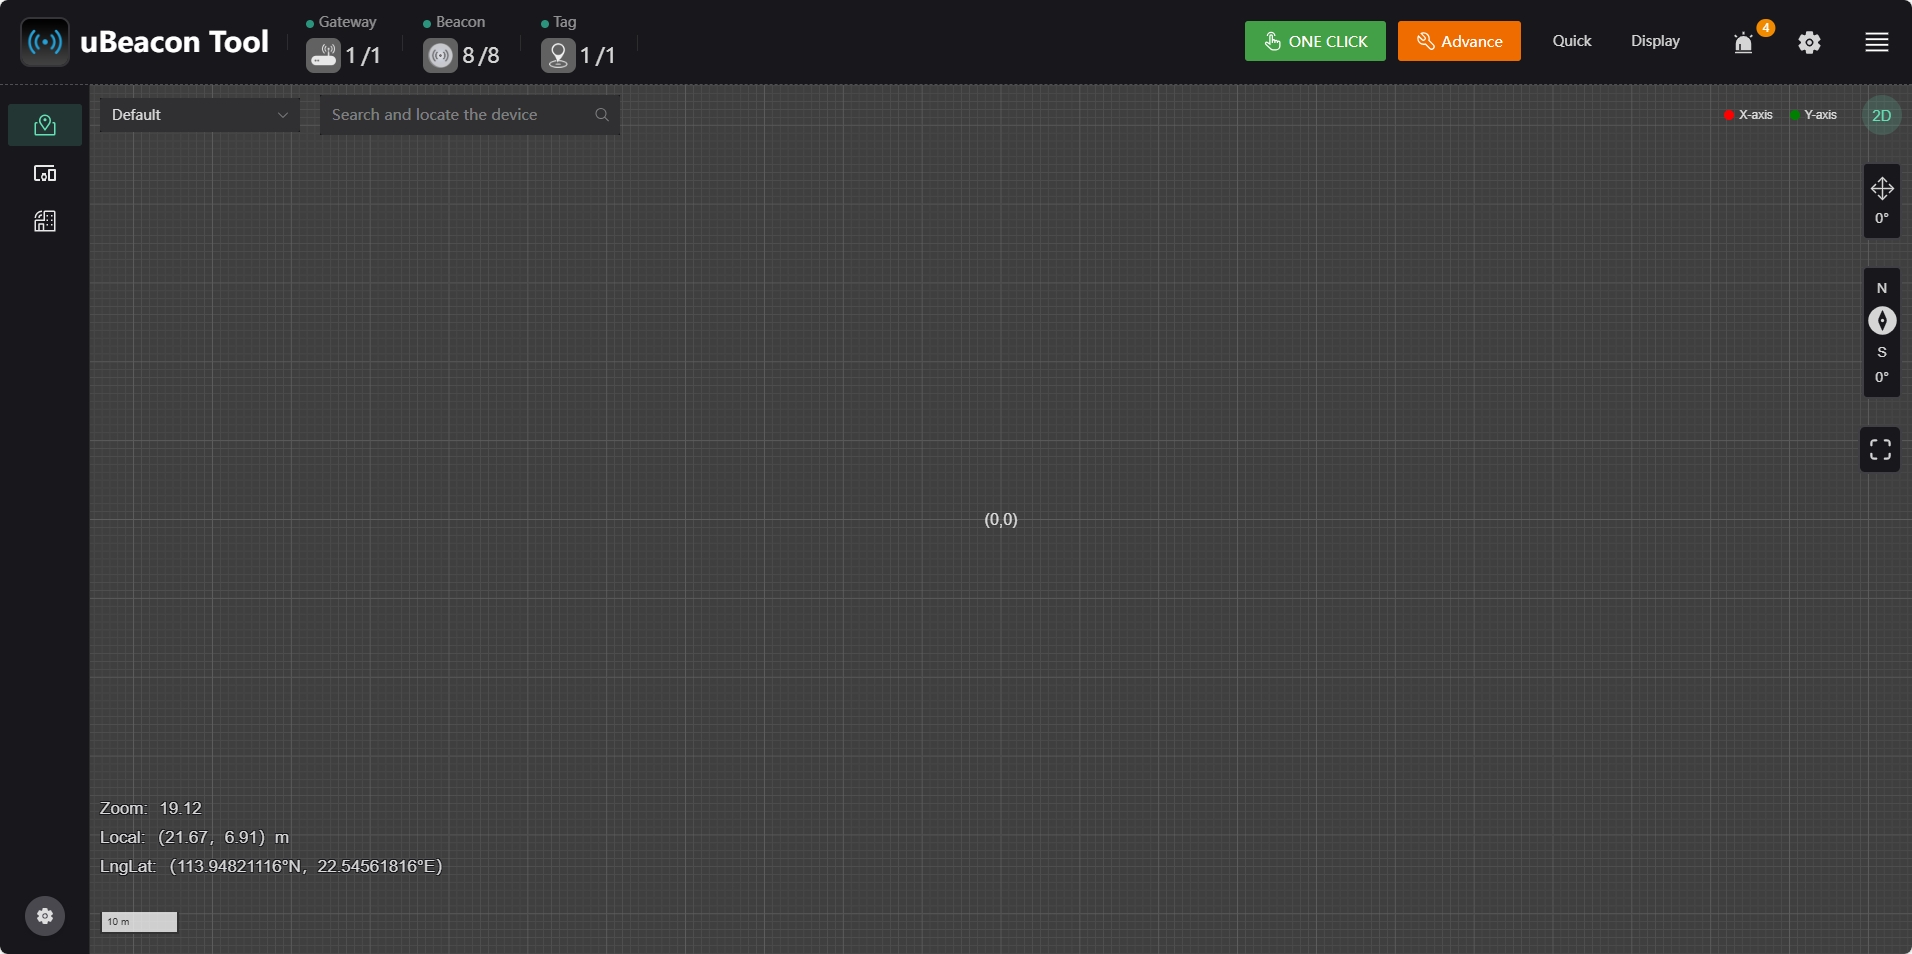
Next, return to the home page. The map is now empty and no beacons are displayed.
Click the "advance" button at the top of the interface, click "Anchor Setting", and select the beacon to be used in the "Set Device Coordinate" list box.
In the "set Device Coordinate" column, click the beacon you want to use and then click anywhere on the map to add it. After the beacon is added to the map, click the beacon icon and click "Edit" in the "Anchor Coordinate" column to modify the beacon coordinates.

Add multiple beacons in sequence. After placing the beacons in the map, click "Add Links" in the "Set Anchor Links" setting bar to select the 4 beacons in the map for uBeacon networking. After the networking is successful, green lines will be formed between the beacons. After the networking is completed, click "Apply Settings" in the upper right corner to save the configuration.
