1D Positioning Constraint Settings
This tutorial provides an example of setting a one-dimensional positioning label range constraint.
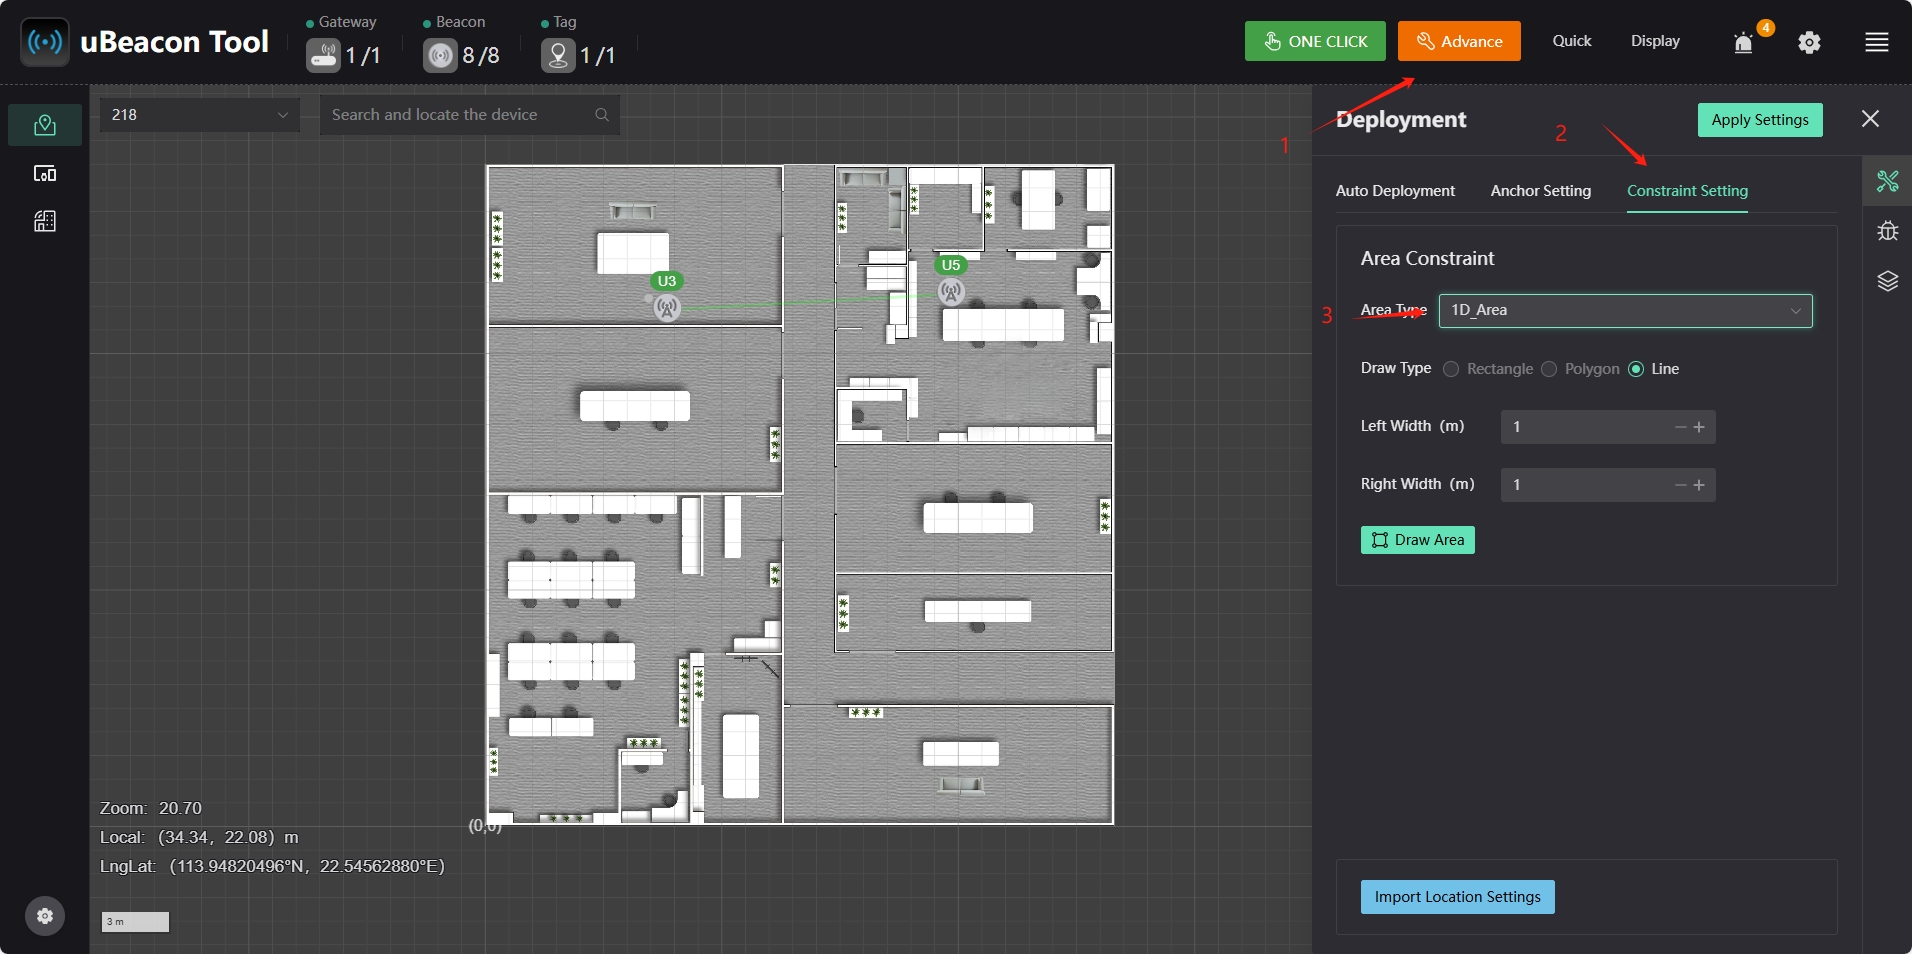
Run the uBeacon Tool software. Click the "Advance" button on the main page. Select "Constraint Setting". Select the "1D_Area" option in "Area Type".
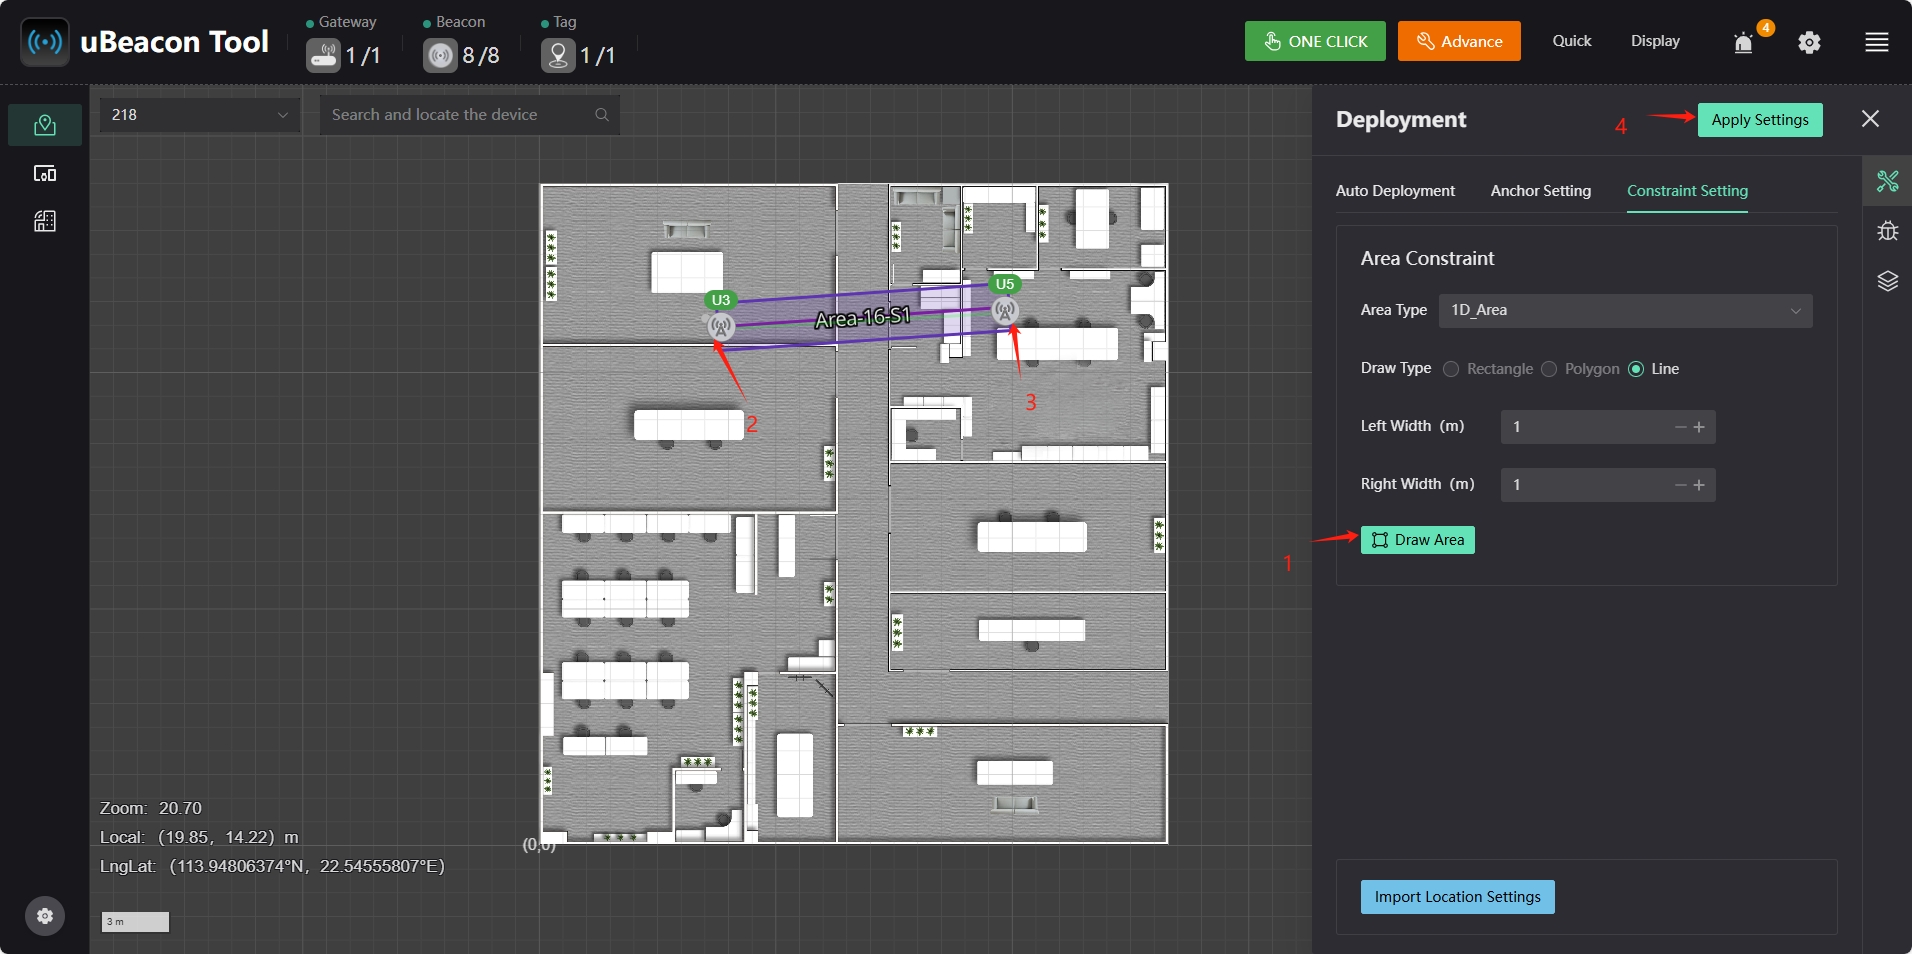
Click the "Draw Area" button, click the two points on the map where the one-dimensional positioning area is required, and then double-click the left mouse button to complete the one-dimensional area constraint setting.
Click the constraint area in the map. In the "Polyline Points" interface, click the "Edit Points" button and uncheck "Enable Drag" to set the X.Y.Z of the area node. Click the "Save" button to save the current operation.
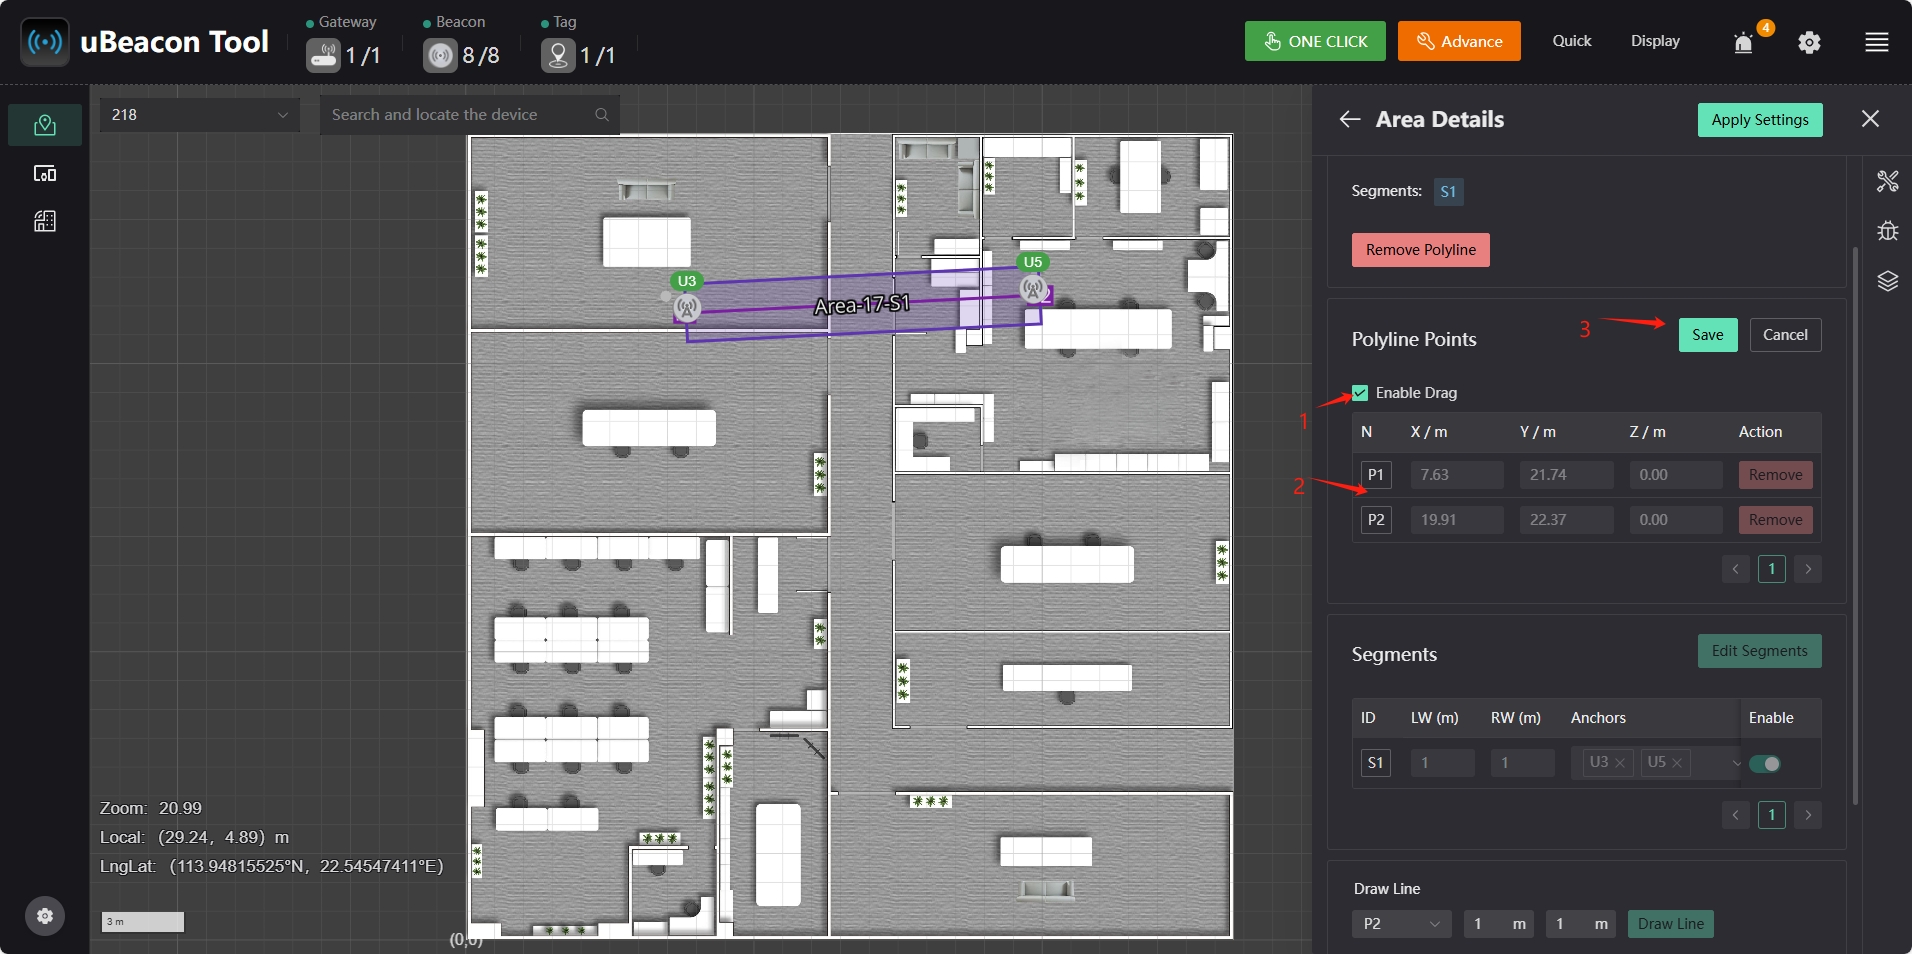
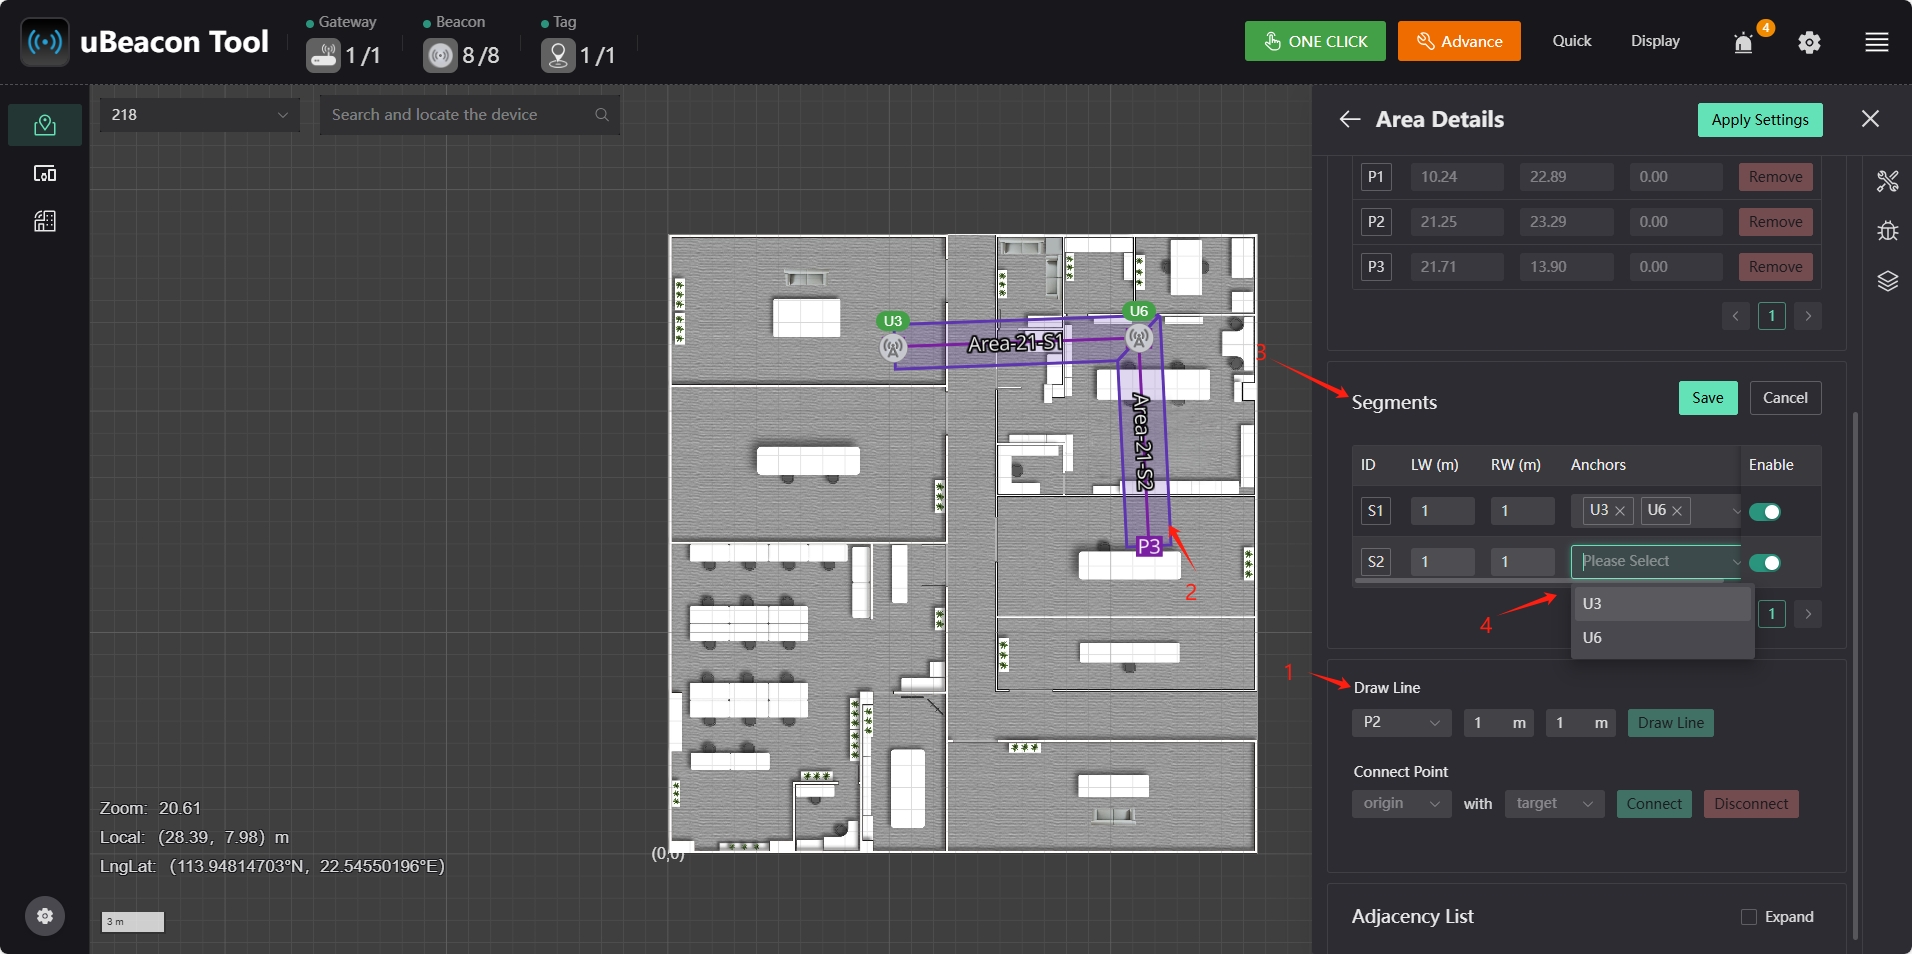
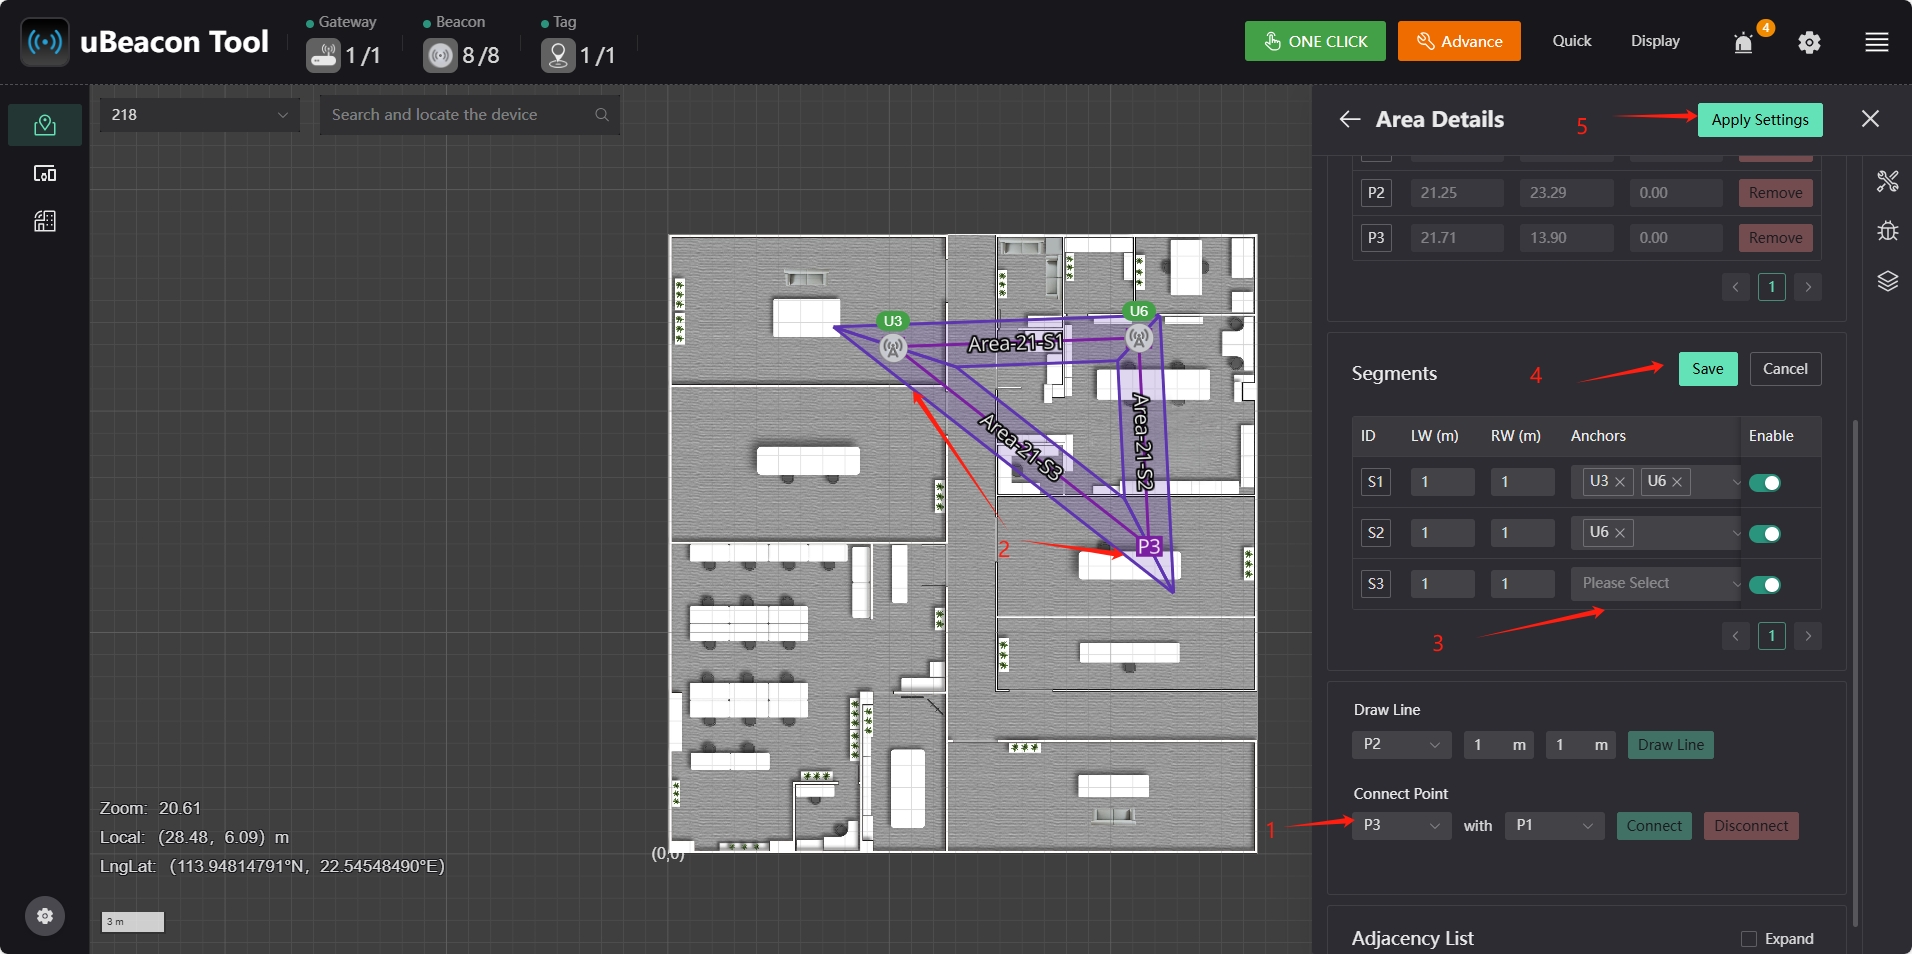
In the "Segments" interface, click the "Edit Segments" button to adjust the constraint width of the beacon and the beacon that sends data. "It is recommended to check all. If no beacon is selected, the one-dimensional positioning will not take effect." Click the "Save" button to save the current operation.
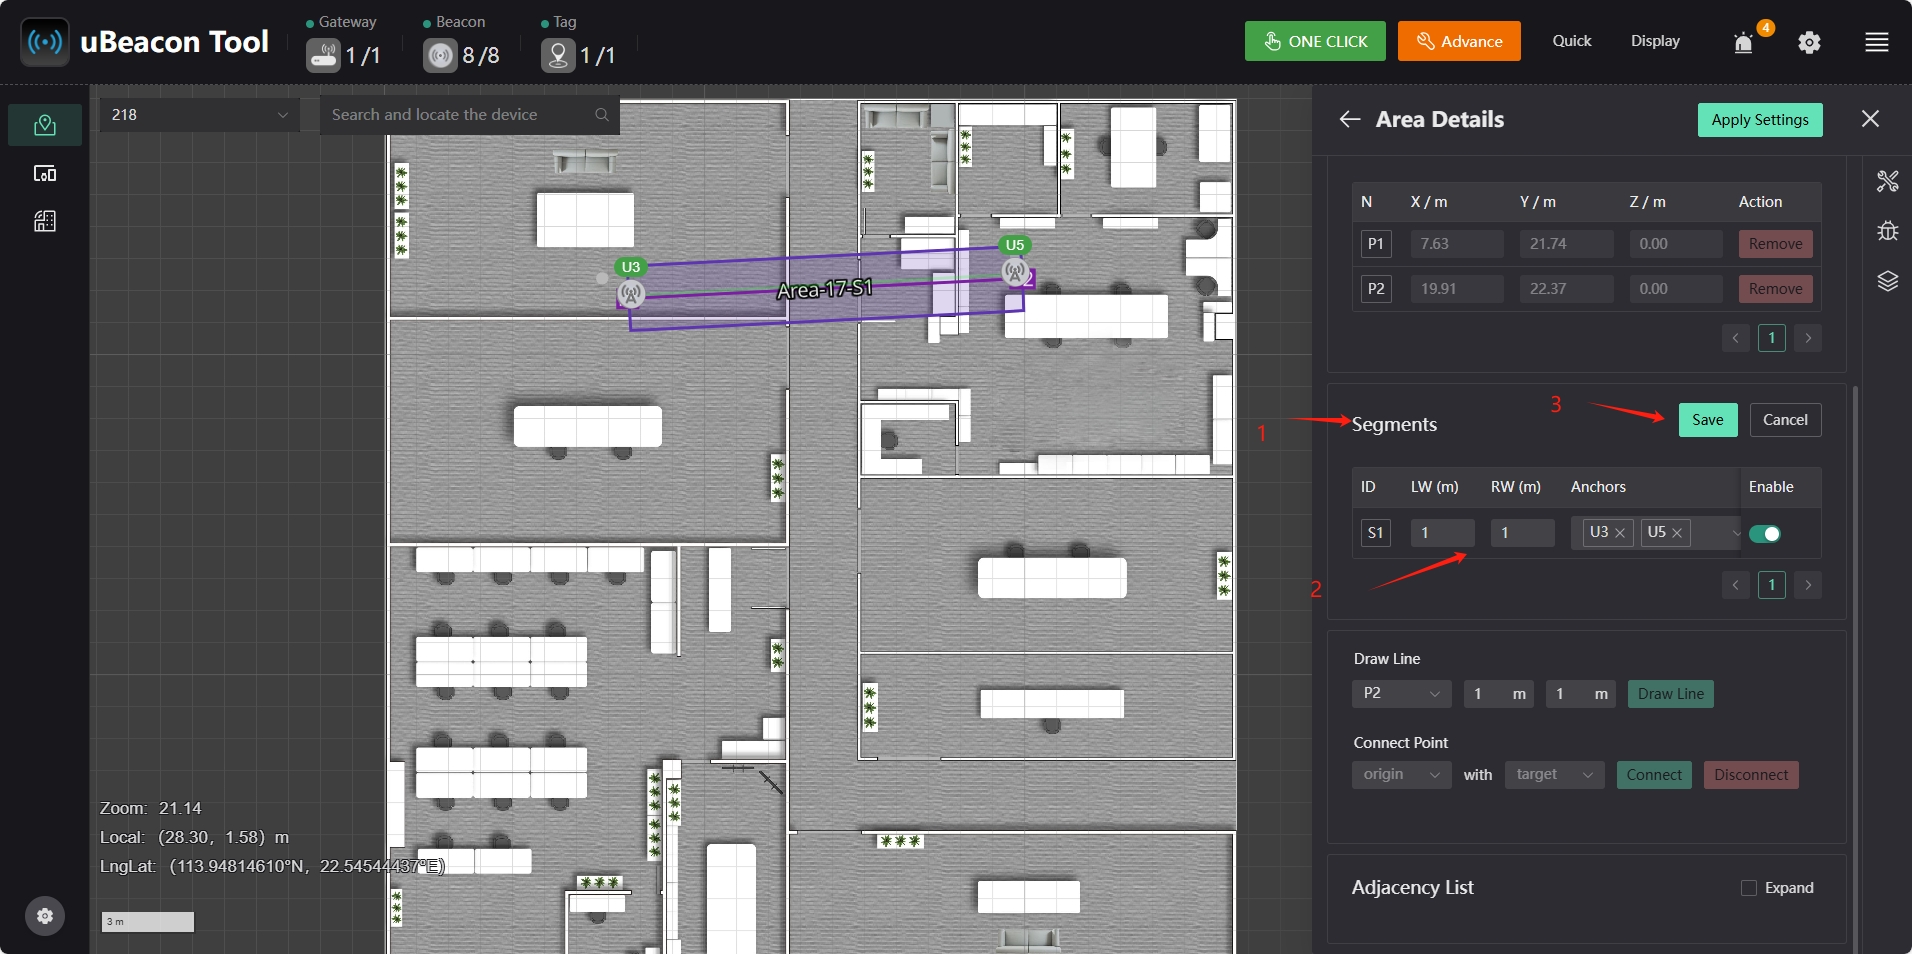
Select a node position in the "Draw Line" interface and click the "Draw Line" button to add a new node to the map. Note: After adding a new node, you need to set the beacon for the new node to send data in "Segments", otherwise the new node will not take effect.
Click the "Connect" button in the "Connect Point" interface to set the node's intercommunication. This function is usually used for intercommunication tunnels or corridors. You can select the intercommunication settings between two nodes. Note: This operation requires setting the beacon for the new node to send data in "Segments", otherwise it will not take effect. After completing all operations, click "Apply Settings" to save the configuration.
2D Positioning Constraint Settings
This tutorial provides an example of setting up range constraints for 2D positioning labels.
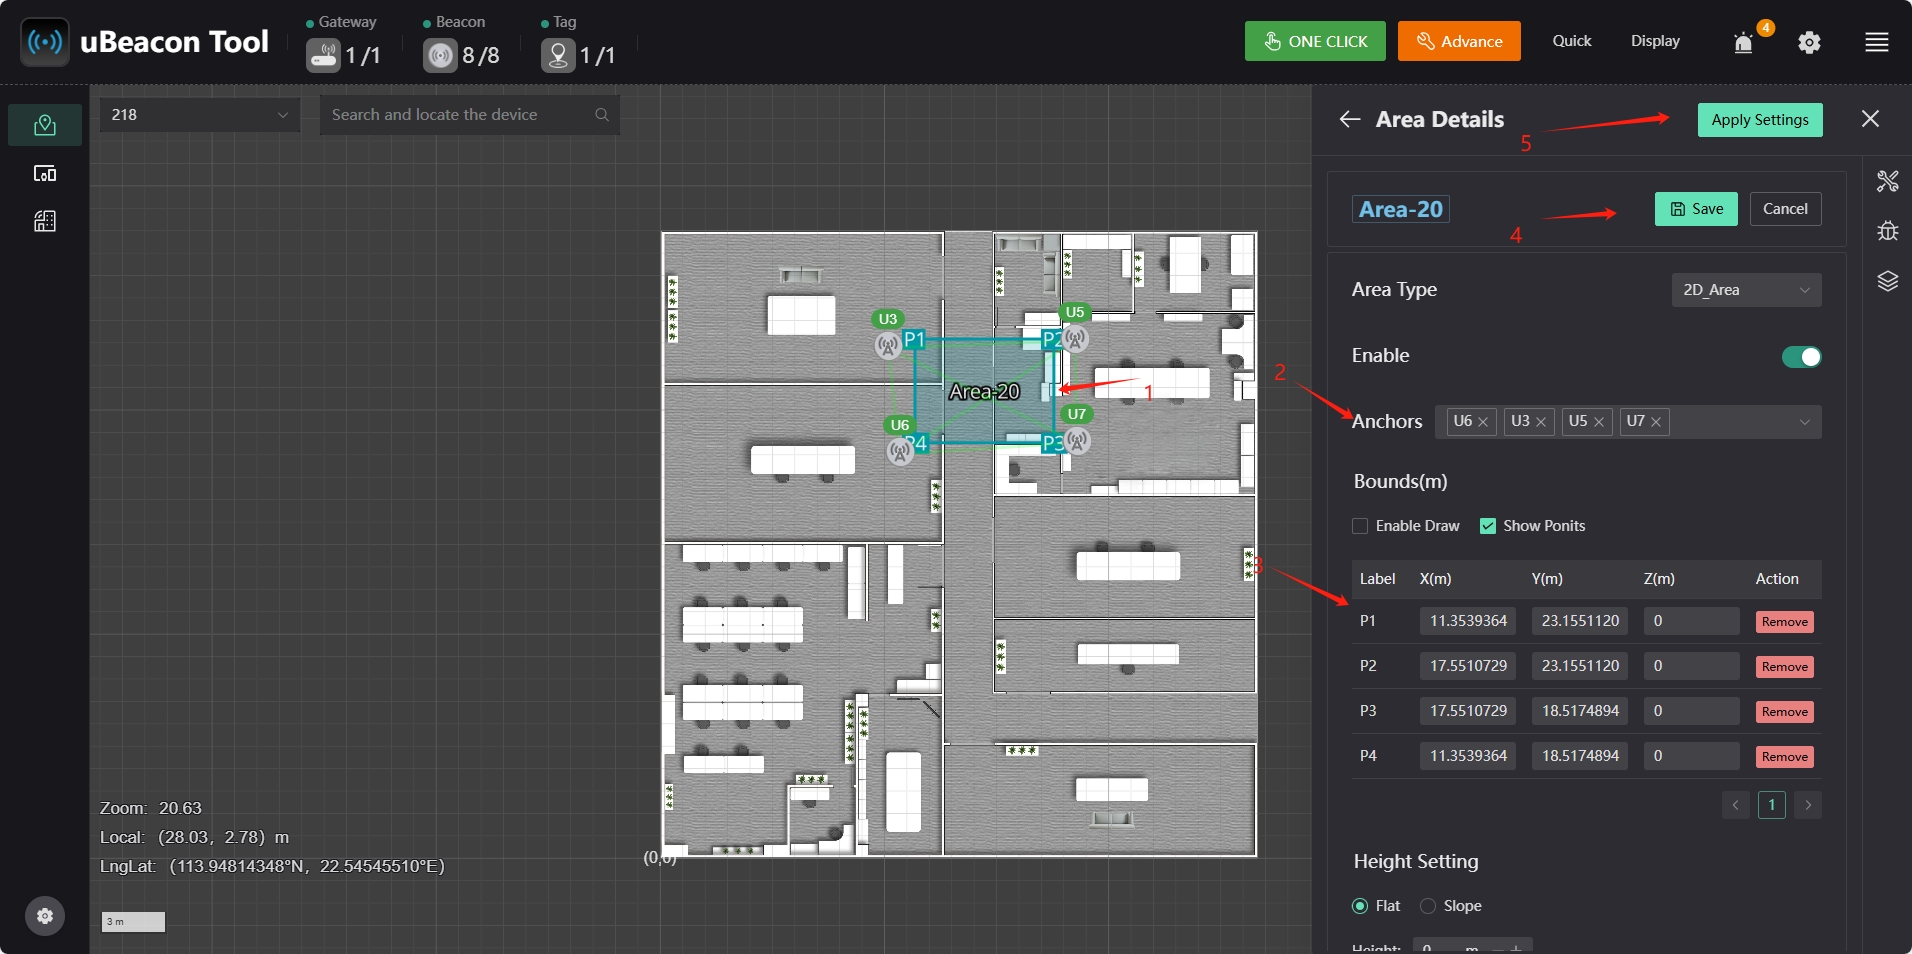
Run the uBeacon Tool software. Click the "Advance" button on the main page. Select "Constraint Setting". Select the "2D_Area" option in "Area Type".

Click the "Draw Area" button to select the area that needs two-dimensional positioning in the map and double-click the left mouse button to complete the two-dimensional area constraint setting.
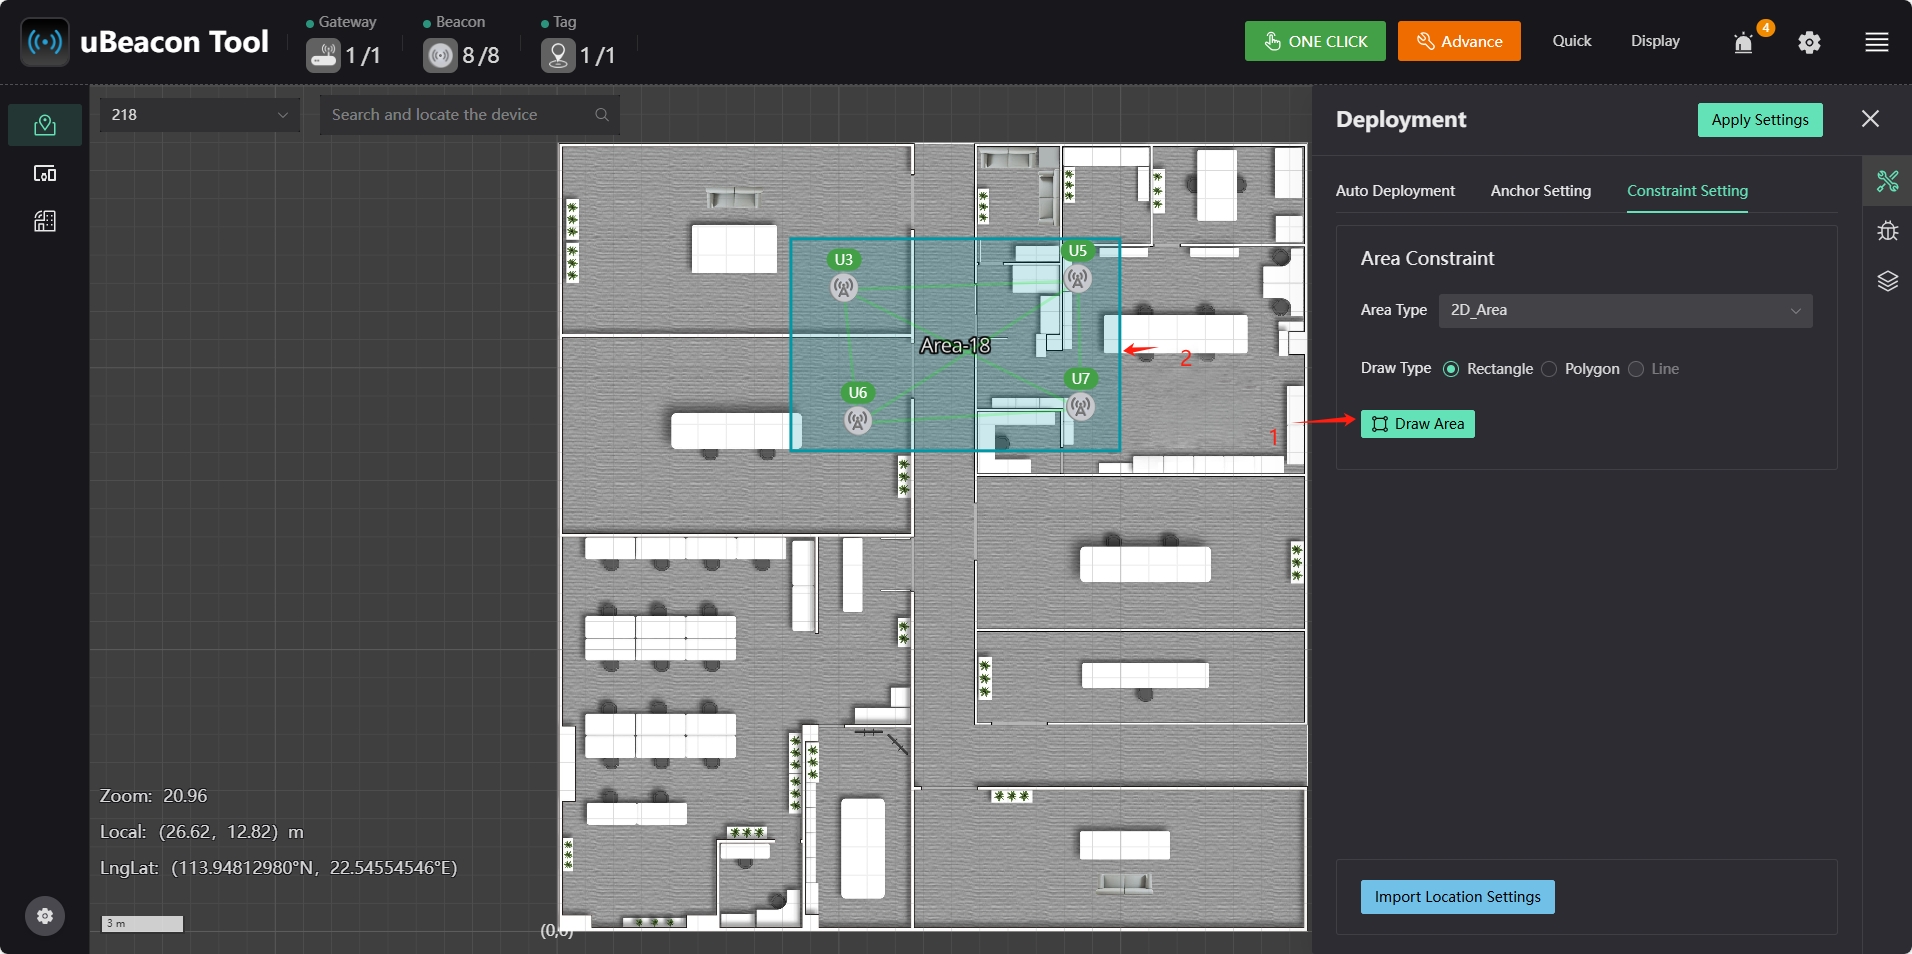
Click the constraint area and click the "Edit Area" button to enter the editing state. In the selection box on the right of "Anchors", select the beacon that needs to send data in this two-dimensional area. "It is recommended to check all. If no beacon is selected, the two-dimensional positioning will not take effect." In the "Bounds" interface, you can set the X.Y.Z of each node and click the "Save" button to save the current operation. After the modification is completed, click the "Apply Settings" button in the upper right corner to save the configuration.