Multi-Floor Positioning Deployment
This tutorial is a multi-floor deployment solution. Through this tutorial, users can complete the multi-floor deployment by themselves.
Step 1
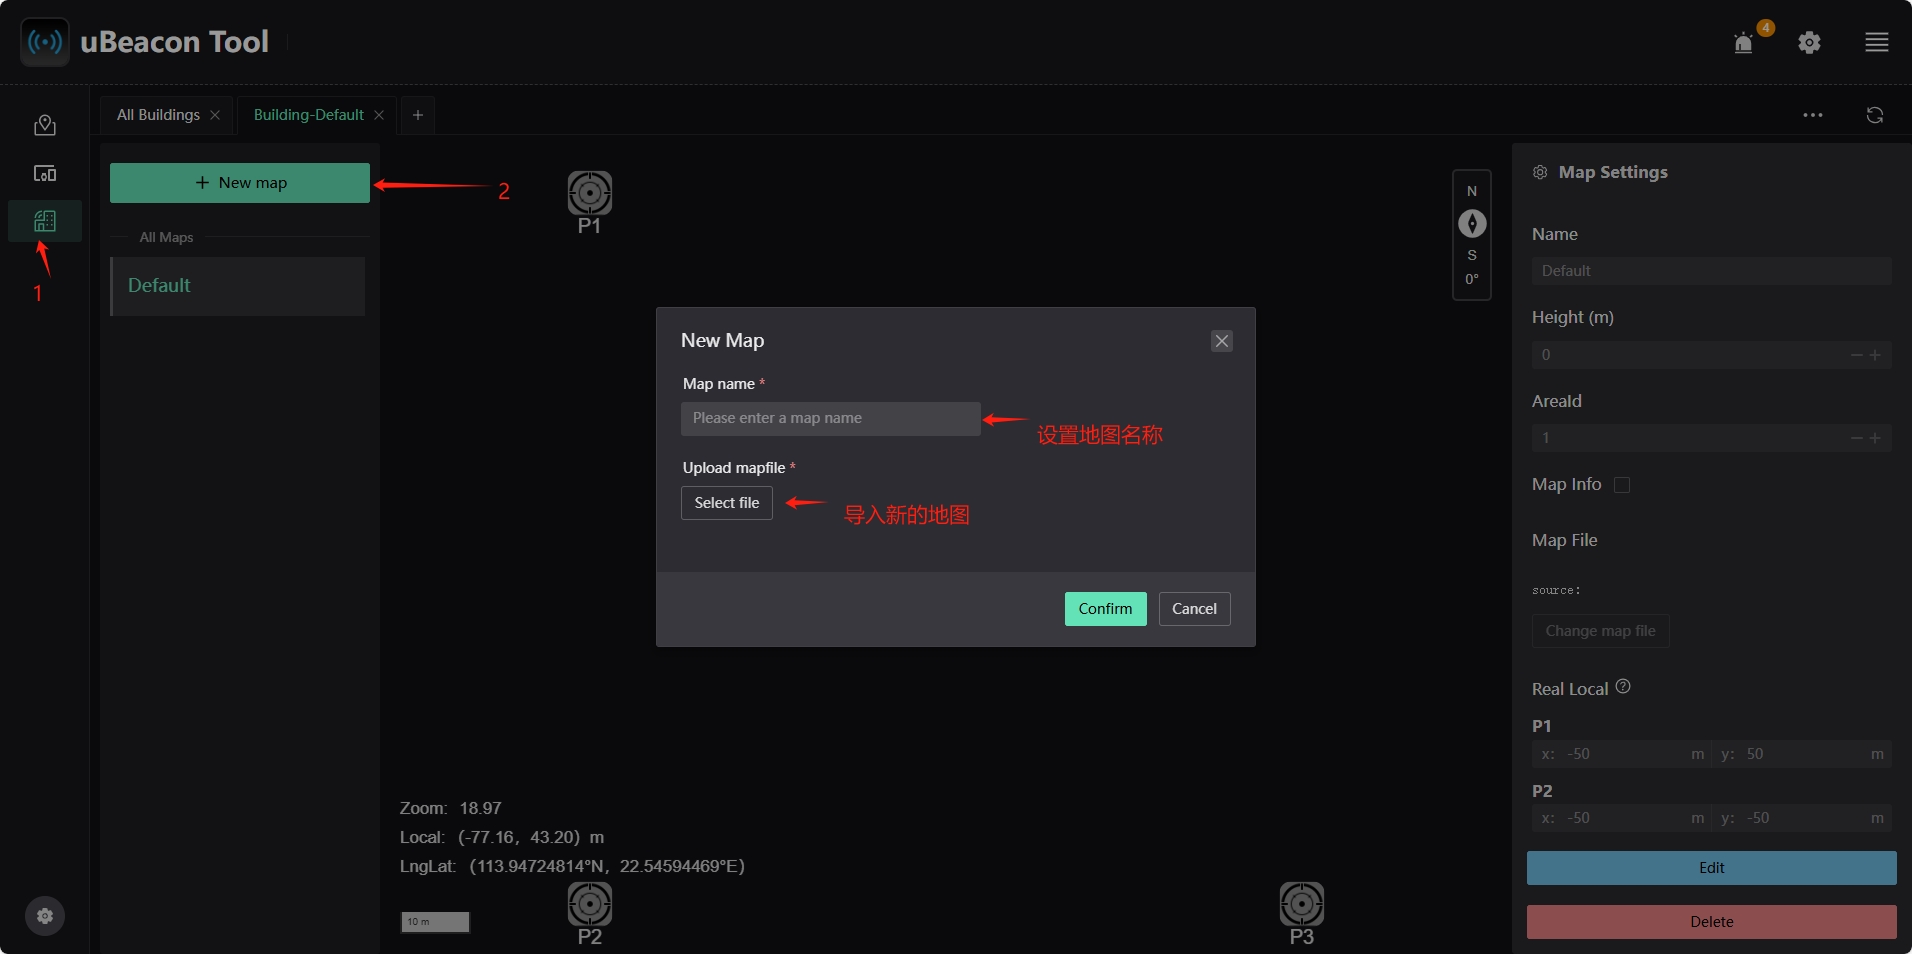
Run the uBeacon Tool software and click the "Map Management" icon in the left column. Click the "Edit Map" option in the Default box to enter the map adding page and click the "New map" button to add a map.
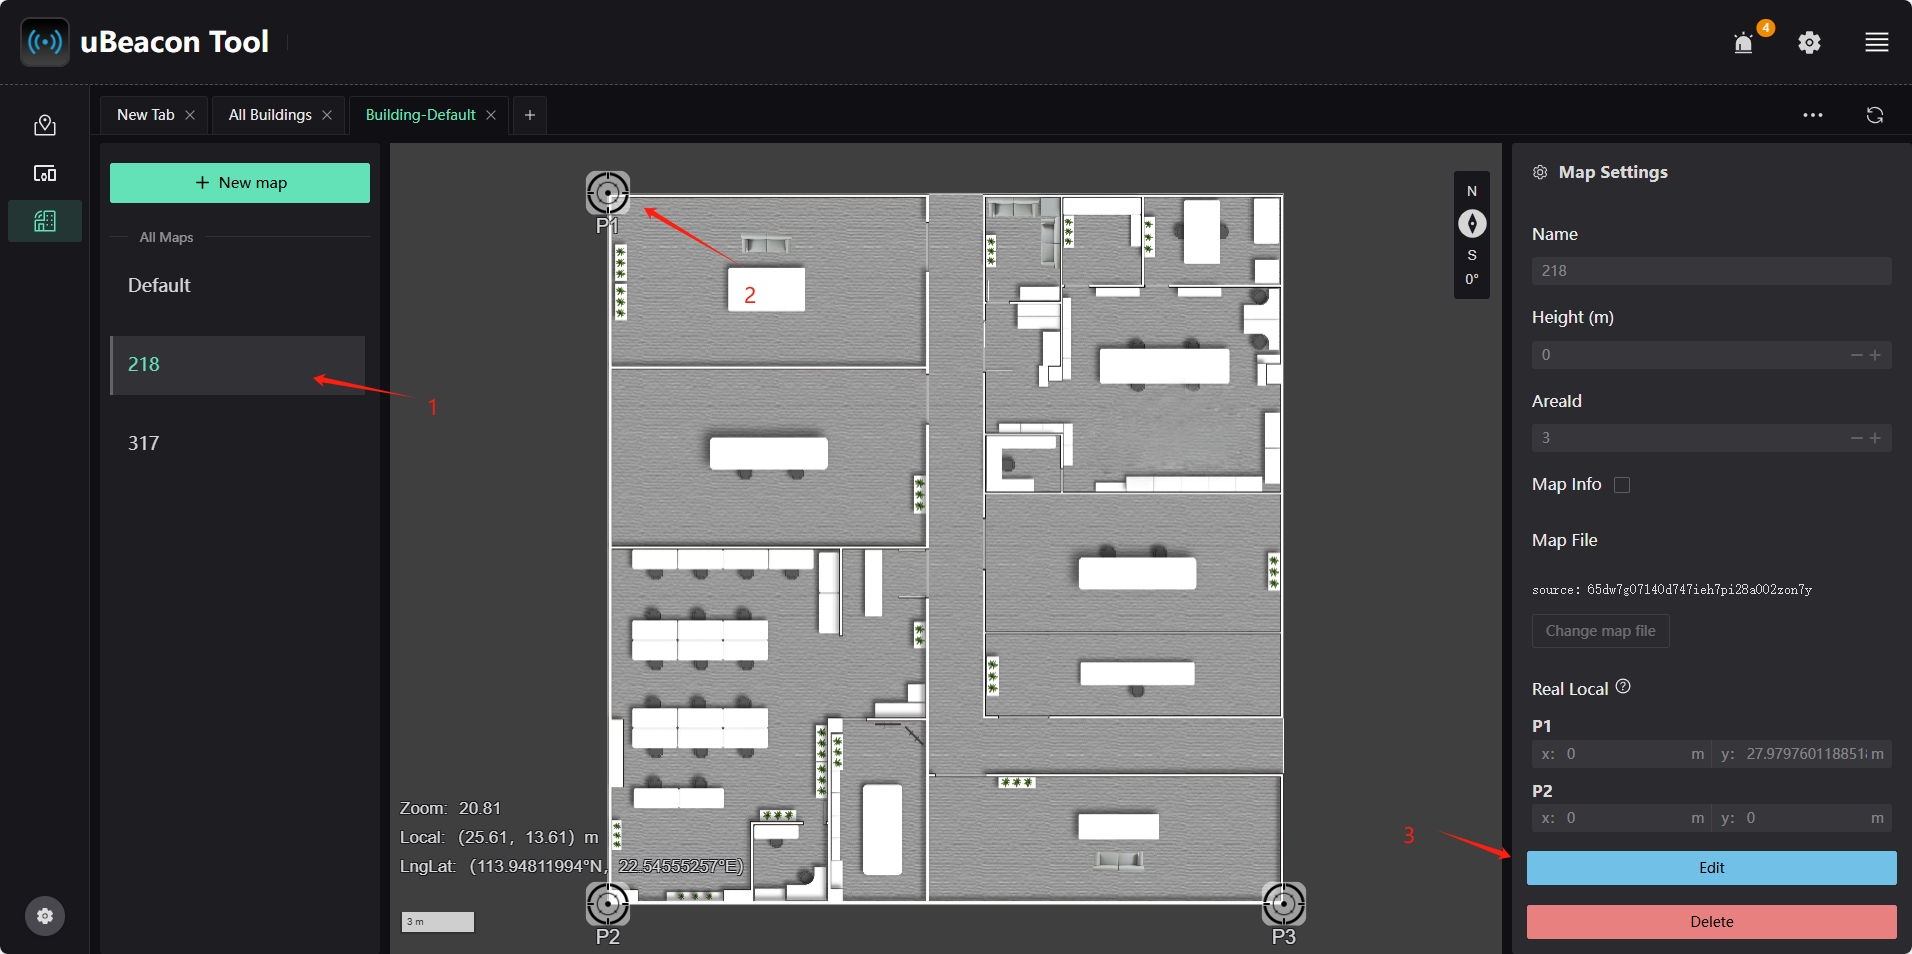
Select the newly added map name to see the newly added map. Three reference points "P1", "P2" and "P3" will appear on the map interface. You can configure the actual corresponding positions of these three reference points to achieve map coordinate mapping. Click the "Edit" button on the right to enter the editing state.
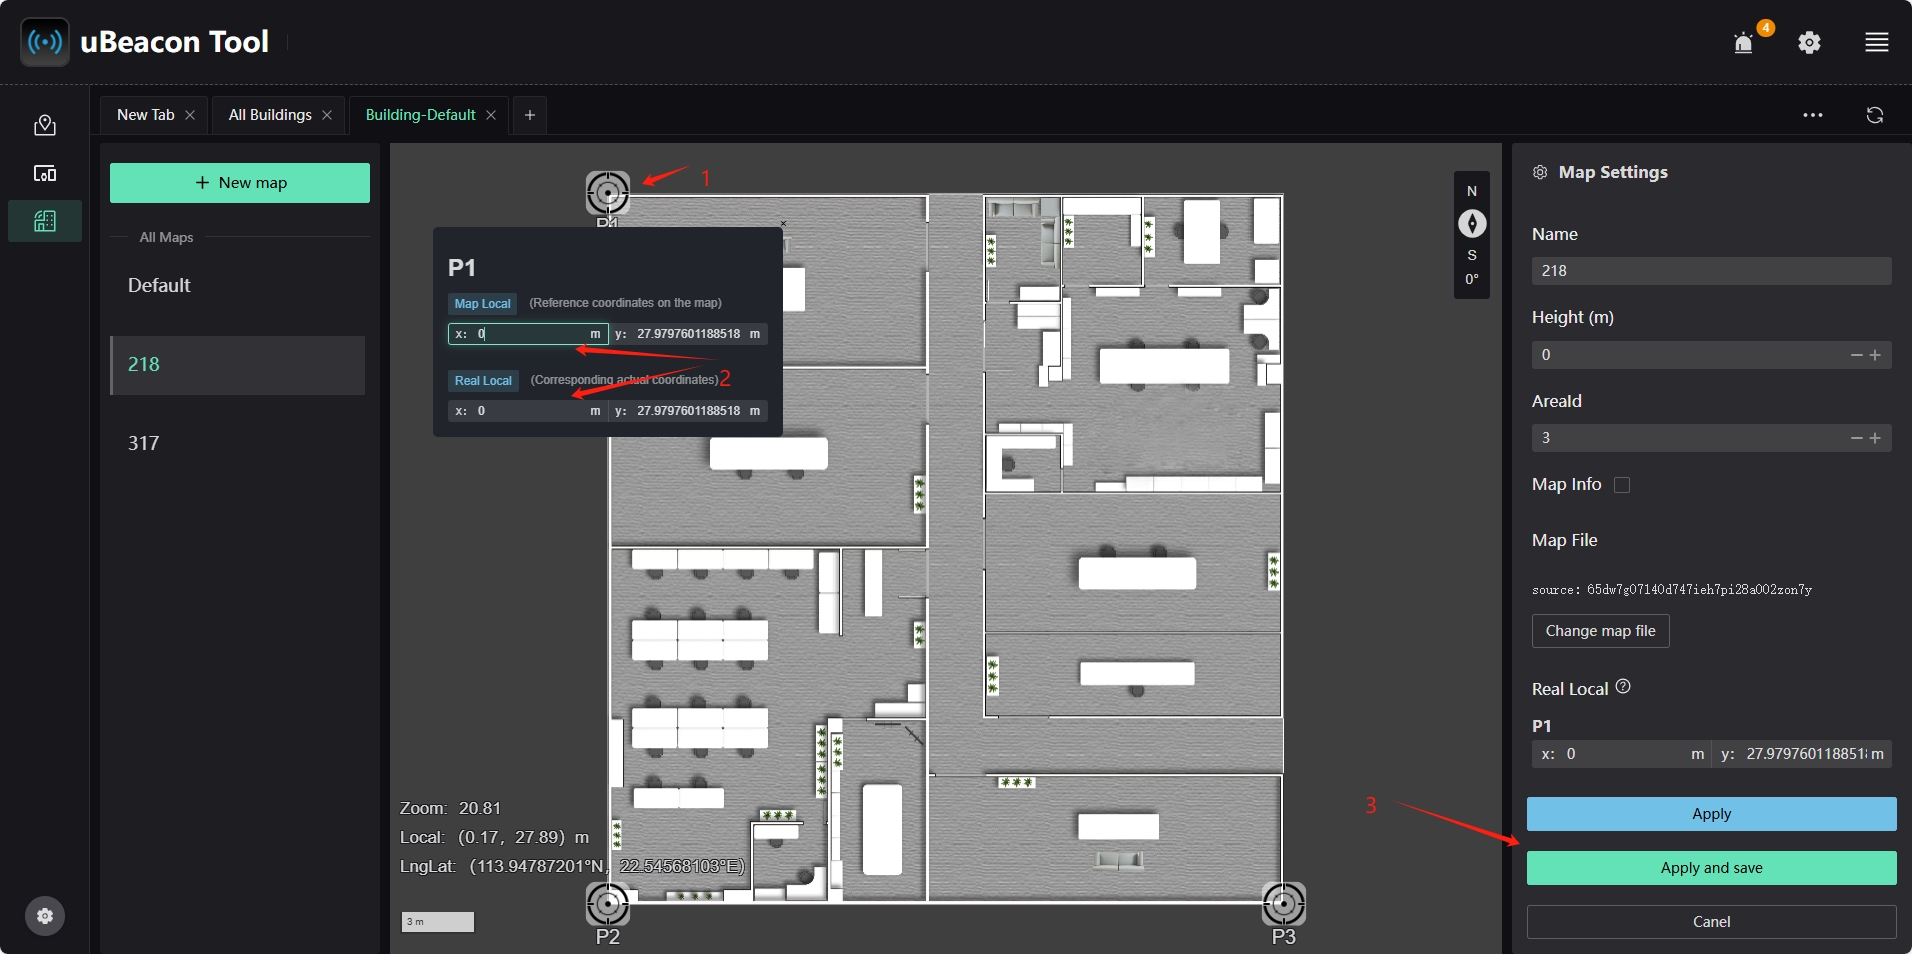
In the editing state, click the "P1" reference point on the map to edit the coordinate value of the current coordinate "Map Local" and the coordinate value of the actual coordinate "Real Local". After editing, click the "Apply and save" button in the lower right corner to apply and save the current operation. The same applies to "P2" and "P3".
Step 2
After configuring the map, click the drop-down box in the upper left corner of the Map Devices page on the system main interface to select the map where the beacon needs to be deployed. Click the "Advance" button in the upper right corner to enter the "Deployment" page and select the beacon to be deployed in the "Set Device Coordinate" configuration drop-down box.
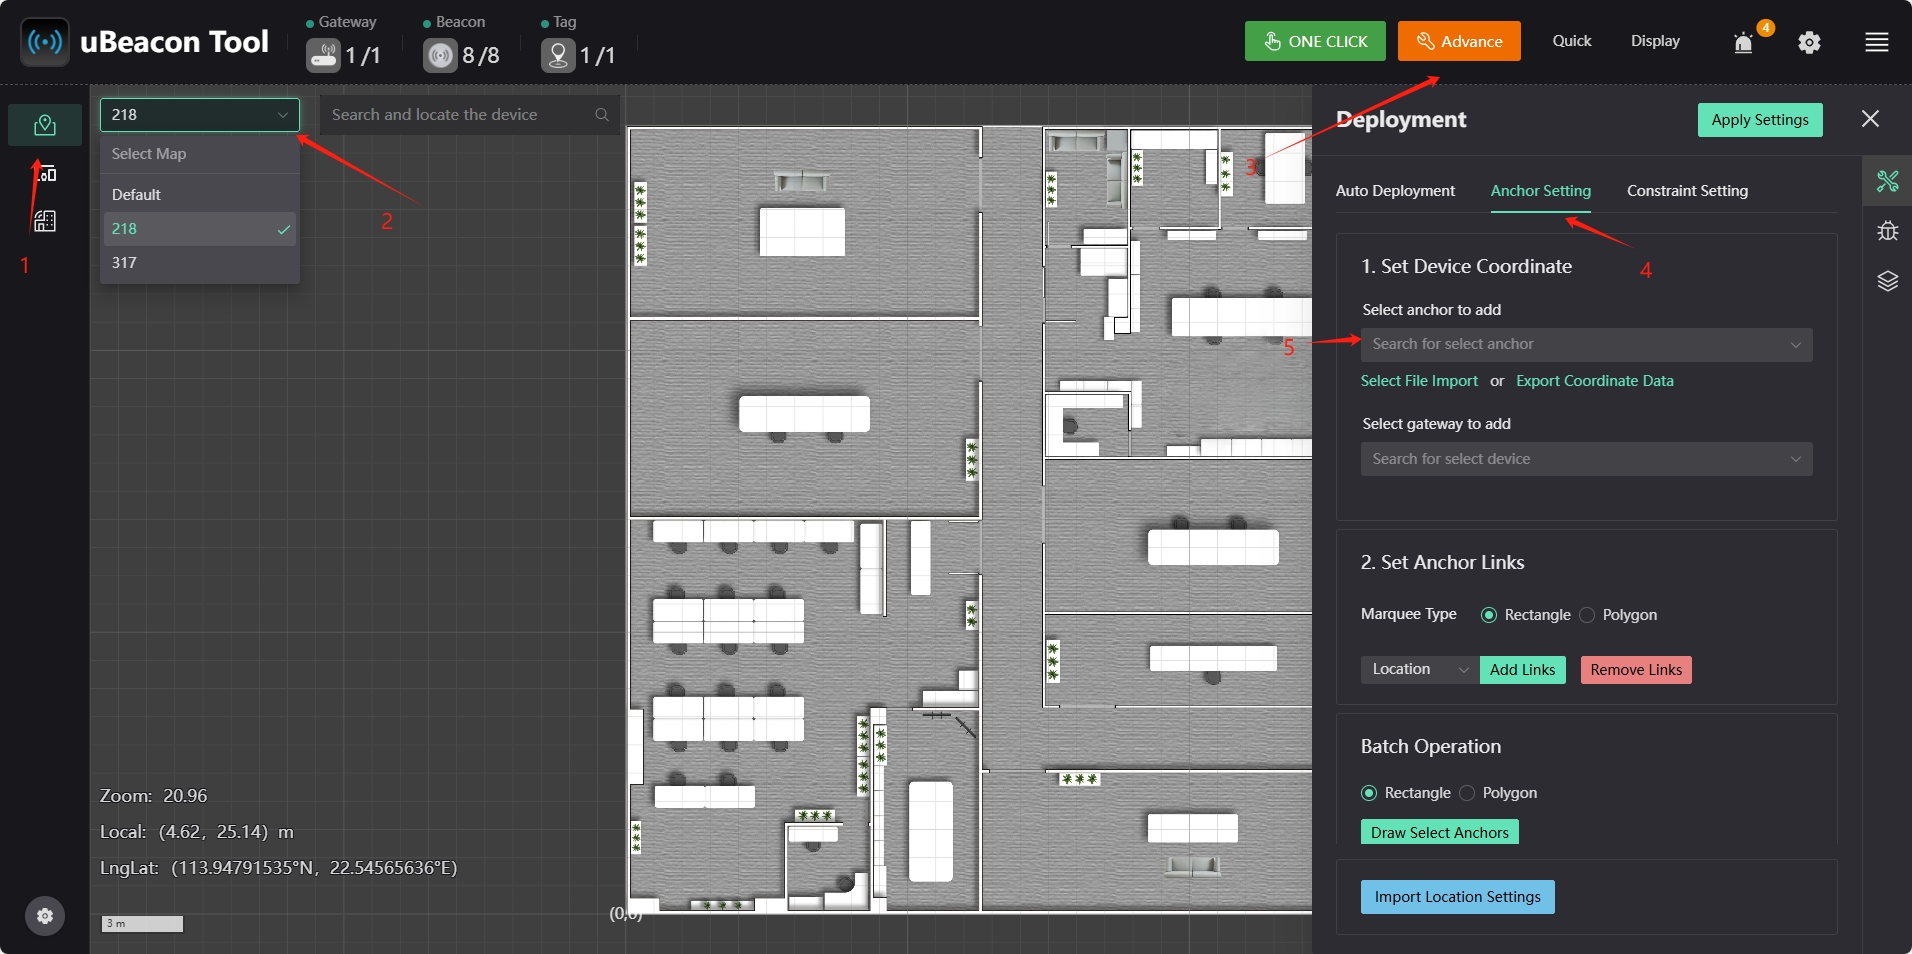
Select the beacon you want to add in the "Set Device Coordinate" configuration drop-down box, move the cursor to the map location corresponding to the beacon, and click the left mouse button to add the beacon.
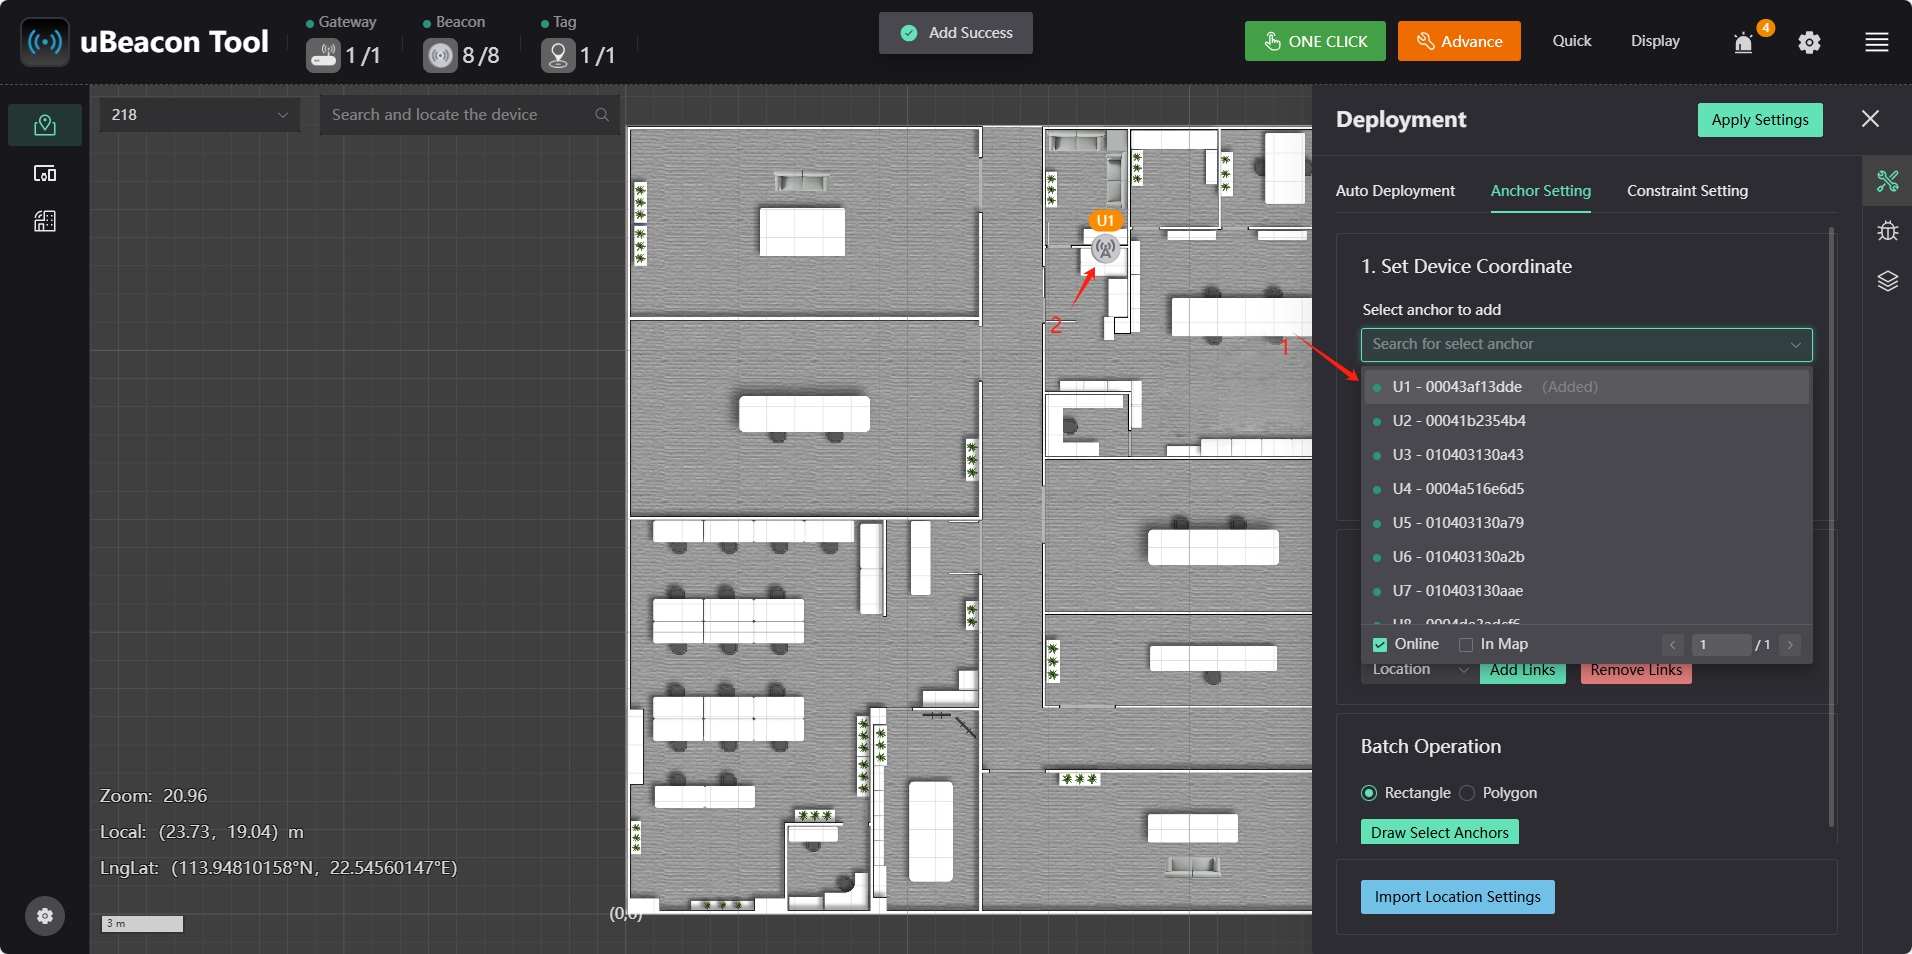
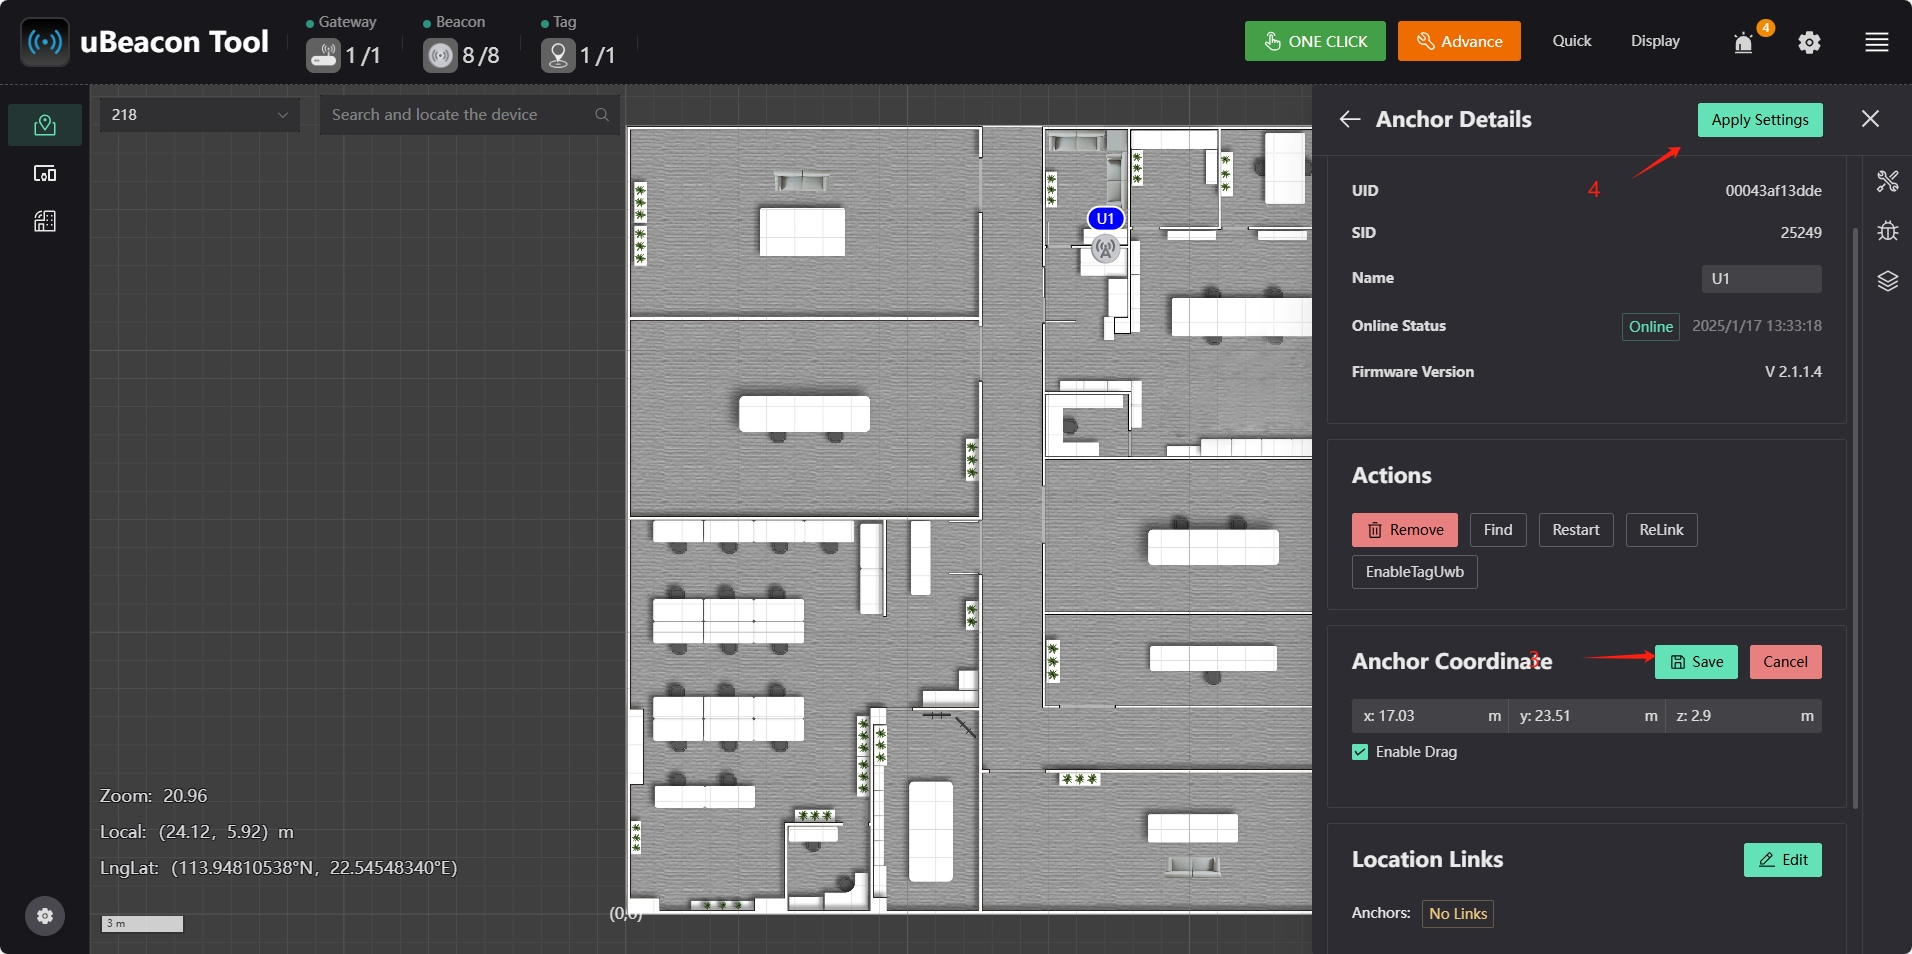
Click the right side of the beacon icon to pop up the beacon device information box. Click "Edit" to correct the beacon coordinates. After the modification is completed, click the "Save" button to complete the modification. Click the "Apply Settings" button in the upper right corner to save the beacon location information.

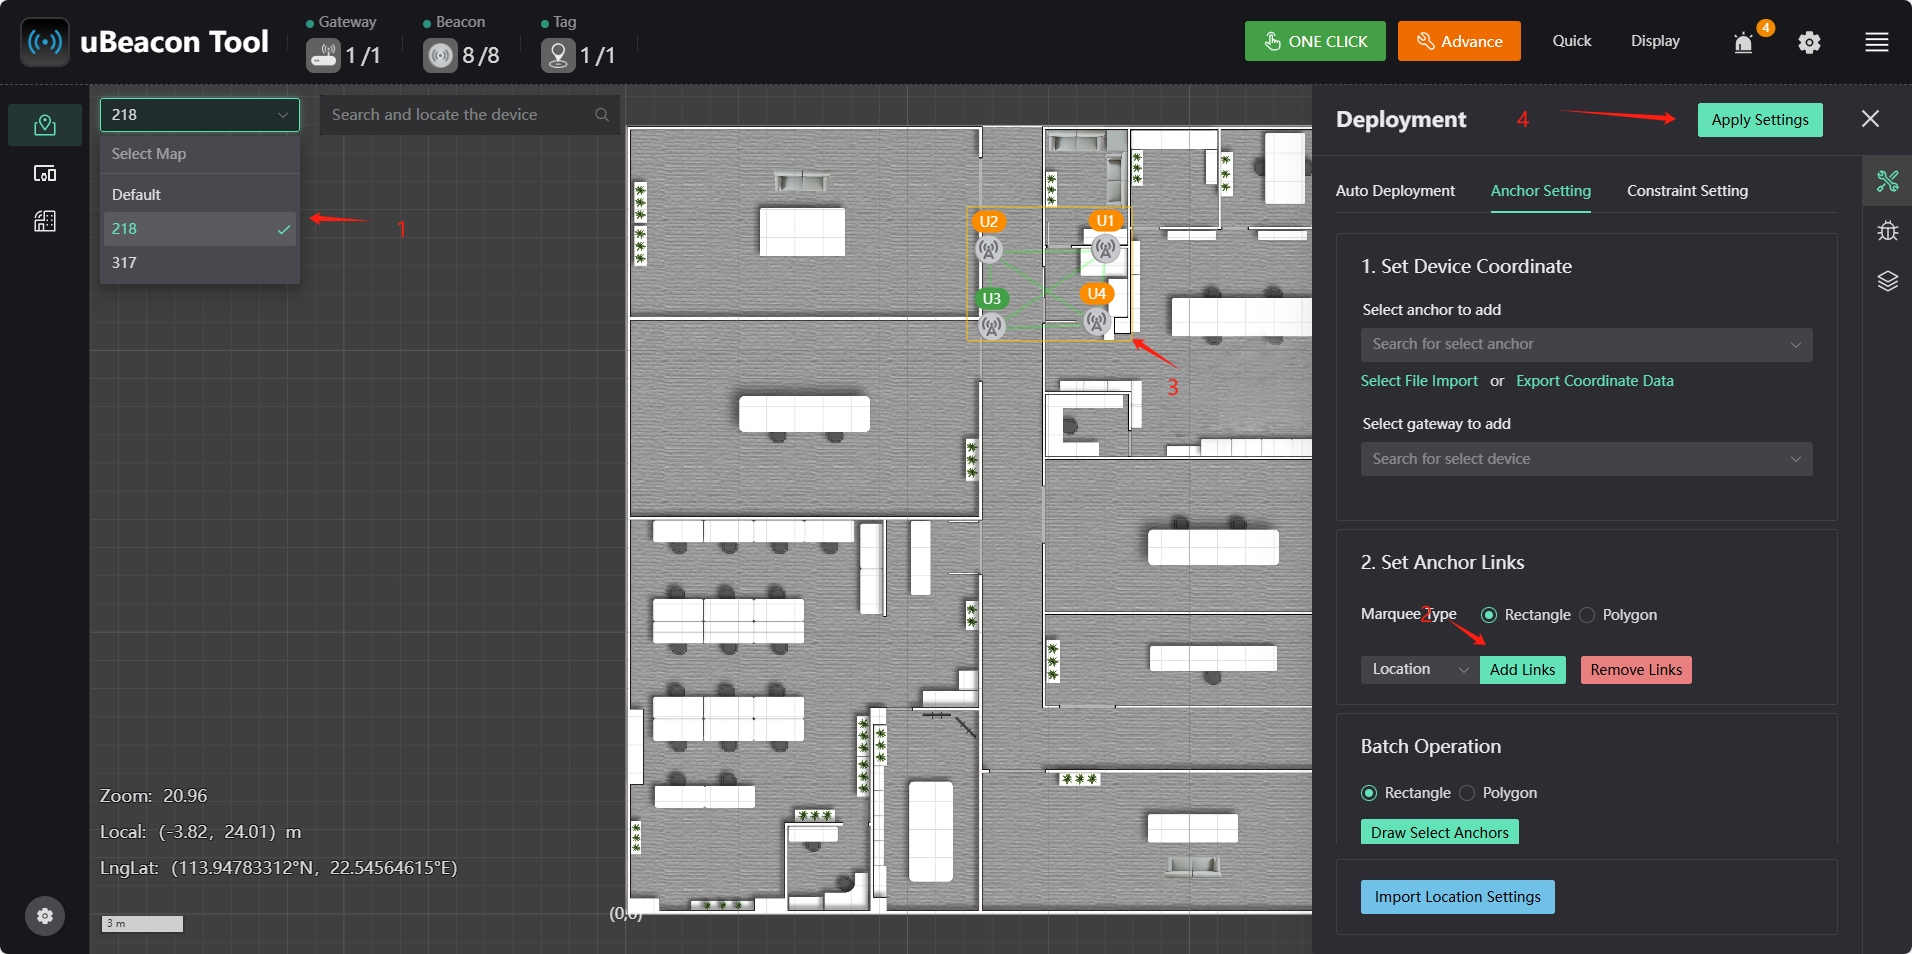
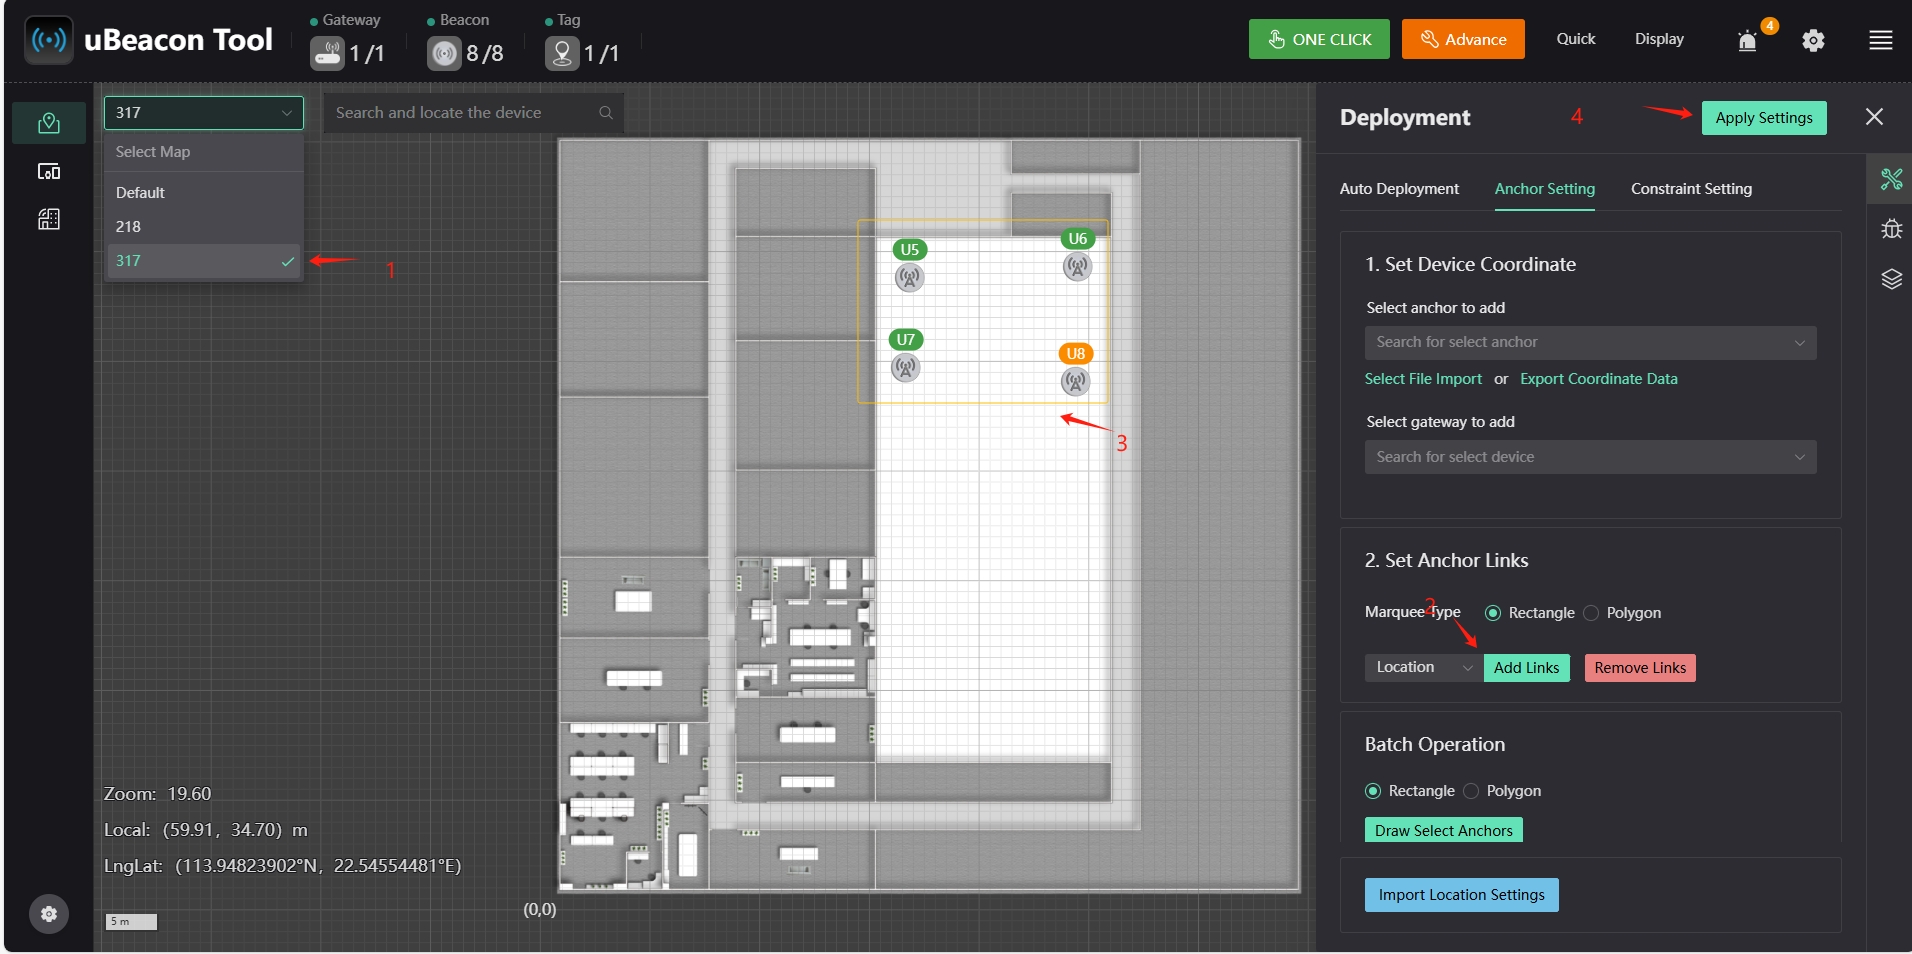
Add corresponding beacons in different maps and ensure that the coordinates are correct. Click the "Add Links" button in the "Set Anchor Links" list, move the mouse to the beacon position, click the left mouse button and drag the mouse to select the corresponding beacon for networking configuration. After the selection is completed, when the beacon is connected by a green line, indicating that the networking is complete, click the "Apply Settings" button in the upper right corner to save the configuration.
Precautions
When deploying beacons on multiple floors, a beacon location is usually selected on the first floor as the origin. At the installation location of each positioning beacon, a reference point is determined to measure the precise coordinates of the beacon relative to the origin. When measuring, factors such as the installation height of the beacon and its relative position to the surrounding environment must be considered to ensure the accuracy of the measurement data.